Trying To Sell Bed Online In OTP Scam Bengaluru Techie Loses Rs 68 Lakh
New Delhi: In another OTP Scam incident, an engineer hailing from Bengaluru lost a whopping Rs 68 lakh while he
Read MoreLatest News and Updates of this Week

New Delhi: In another OTP Scam incident, an engineer hailing from Bengaluru lost a whopping Rs 68 lakh while he
Read More
Pakistan pacer Aamer Jamal picked up a fantastic six-wicket haul to help his side bowl Australia out for 487 on
Read More
The Hyderabad-based firm’s IPO comprises a fresh issue of up to Rs 240 crore and an Offer For Sale (OFS)
Read More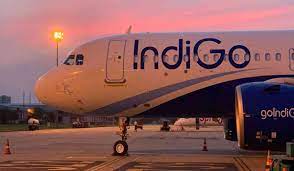
IndiGo, one of India’s most preferred air carriers, has now added Ayodhya to its list. This comes out as the
Read More
Shreyas Talpade had a heart attack while shooting for the film “Welcome to the Jungle” alongside Akshay Kumar.
Read More
New De: Aditya Roy Kapur in the latest episode of ‘Koffee with Karan Season 8’ talked about Kartik Aaryan starring
Read More
Pakistan batter Ahmed Shehzad has penned an emotional note after not being picked by any of the six franchises in
Read More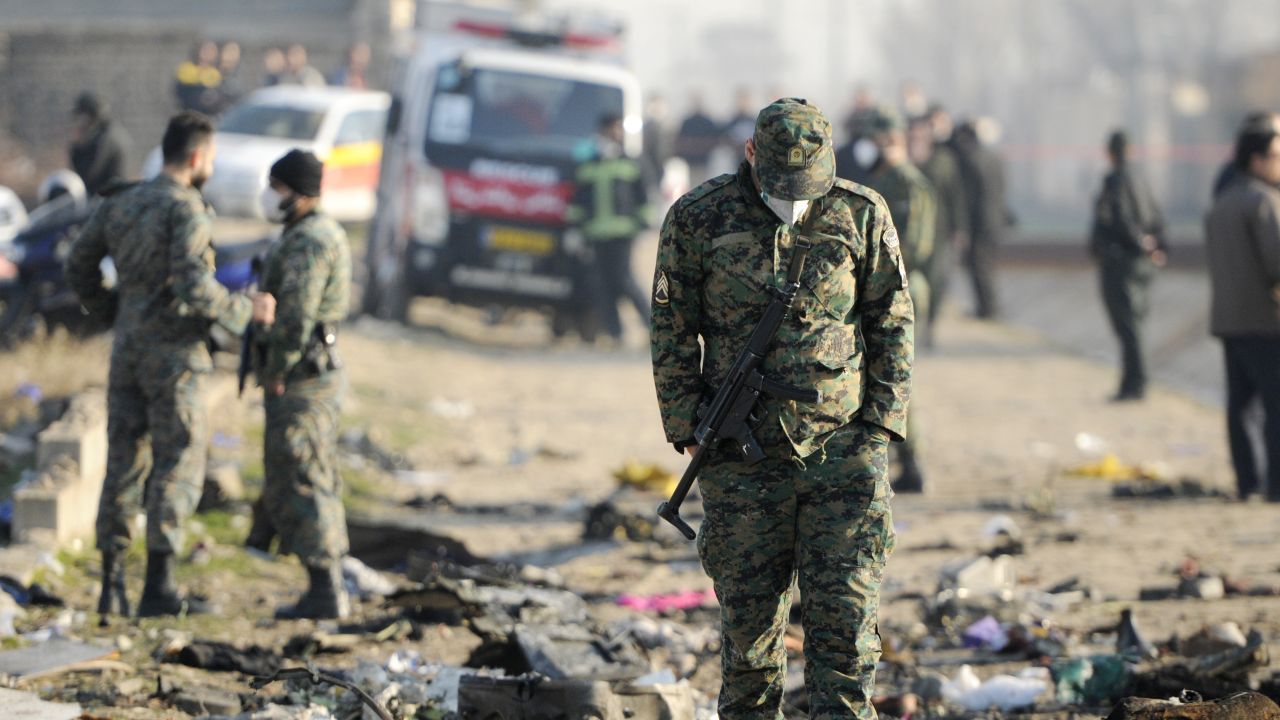
Baluch militants attacked a police station in southeastern Iran early on Friday, killing 11 security personnel and wounding several, state
Read More
Chip-making giant Intel has unveiled a new lineup of products designed to enhance artificial intelligence (AI) solutions across various platforms,
Read More
Rohit Sharma brought the curtains down on the most defining element of his cricket career — the captaincy of Mumbai
Read More
Ravi Shastri said that Shaheen Shah Afridi has an immense workload on his shoulders due to a lack of quality
Read More
A disease in which some of the body’s cells grow uncontrollably and spread to other parts of the body, cancer – despite
Read More
Legendary Australia captain Ricky Ponting feels all-rounder Glenn Maxwell does not deserve to play Test cricket for Australia. Maxwell was
Read More
New Delhi: In the dynamic realm of technology, Apple has once again set new standards with the introduction of its latest
Read More
New Delhi: The total enrolment under the Atal Pension Yojana (APY) has crossed 6 crores, with over 79 lakh enrolments in
Read More
Atal Pension Yojana welcomes any Indian citizen aged between 18 to 40 years.
Read More
More than a third of women worldwide are likely to experience a long-term health problem such as depression, low back
Read More
Billionaire Elon Musk’s mother, Maye Musk, came down heavily on US President Joe Biden, claiming that his administration unfairly targeted
Read More
Deepti Sharma produced a match-winning performance to help India beat England by 347 runs and register the biggest-ever victory in
Read More
Pregnancy is a wonderful journey that brings about a lot of physical and emotional changes. Among the delights and excitement
Read More
Alphabet-owned Google has announced it will start trials for a new feature in its Chrome browser, in a bid to
Read More
Three Israeli hostages were killed in firing by the Israel Defense Forces (IDF), said the military on Saturday. The IDF
Read More
The Lahore High Court on Friday issued notice to Pakistan’s top election body on former prime minister Imran Khan’s plea
Read More
A JetBlue Airways Airbus A320, in January 2022, suffered a tail strike during take-off after the pilots rotated too soon
Read More
The Biden Administration officials on Friday briefed the five Indian-American lawmakers on the indictment of Nikhil Gupta, an Indian, who
Read More
Author Harshada Pathare’s book “The Following” is about strong depiction of its women characters. The book’s protagonist “Kalki” disrupts conventional
Read More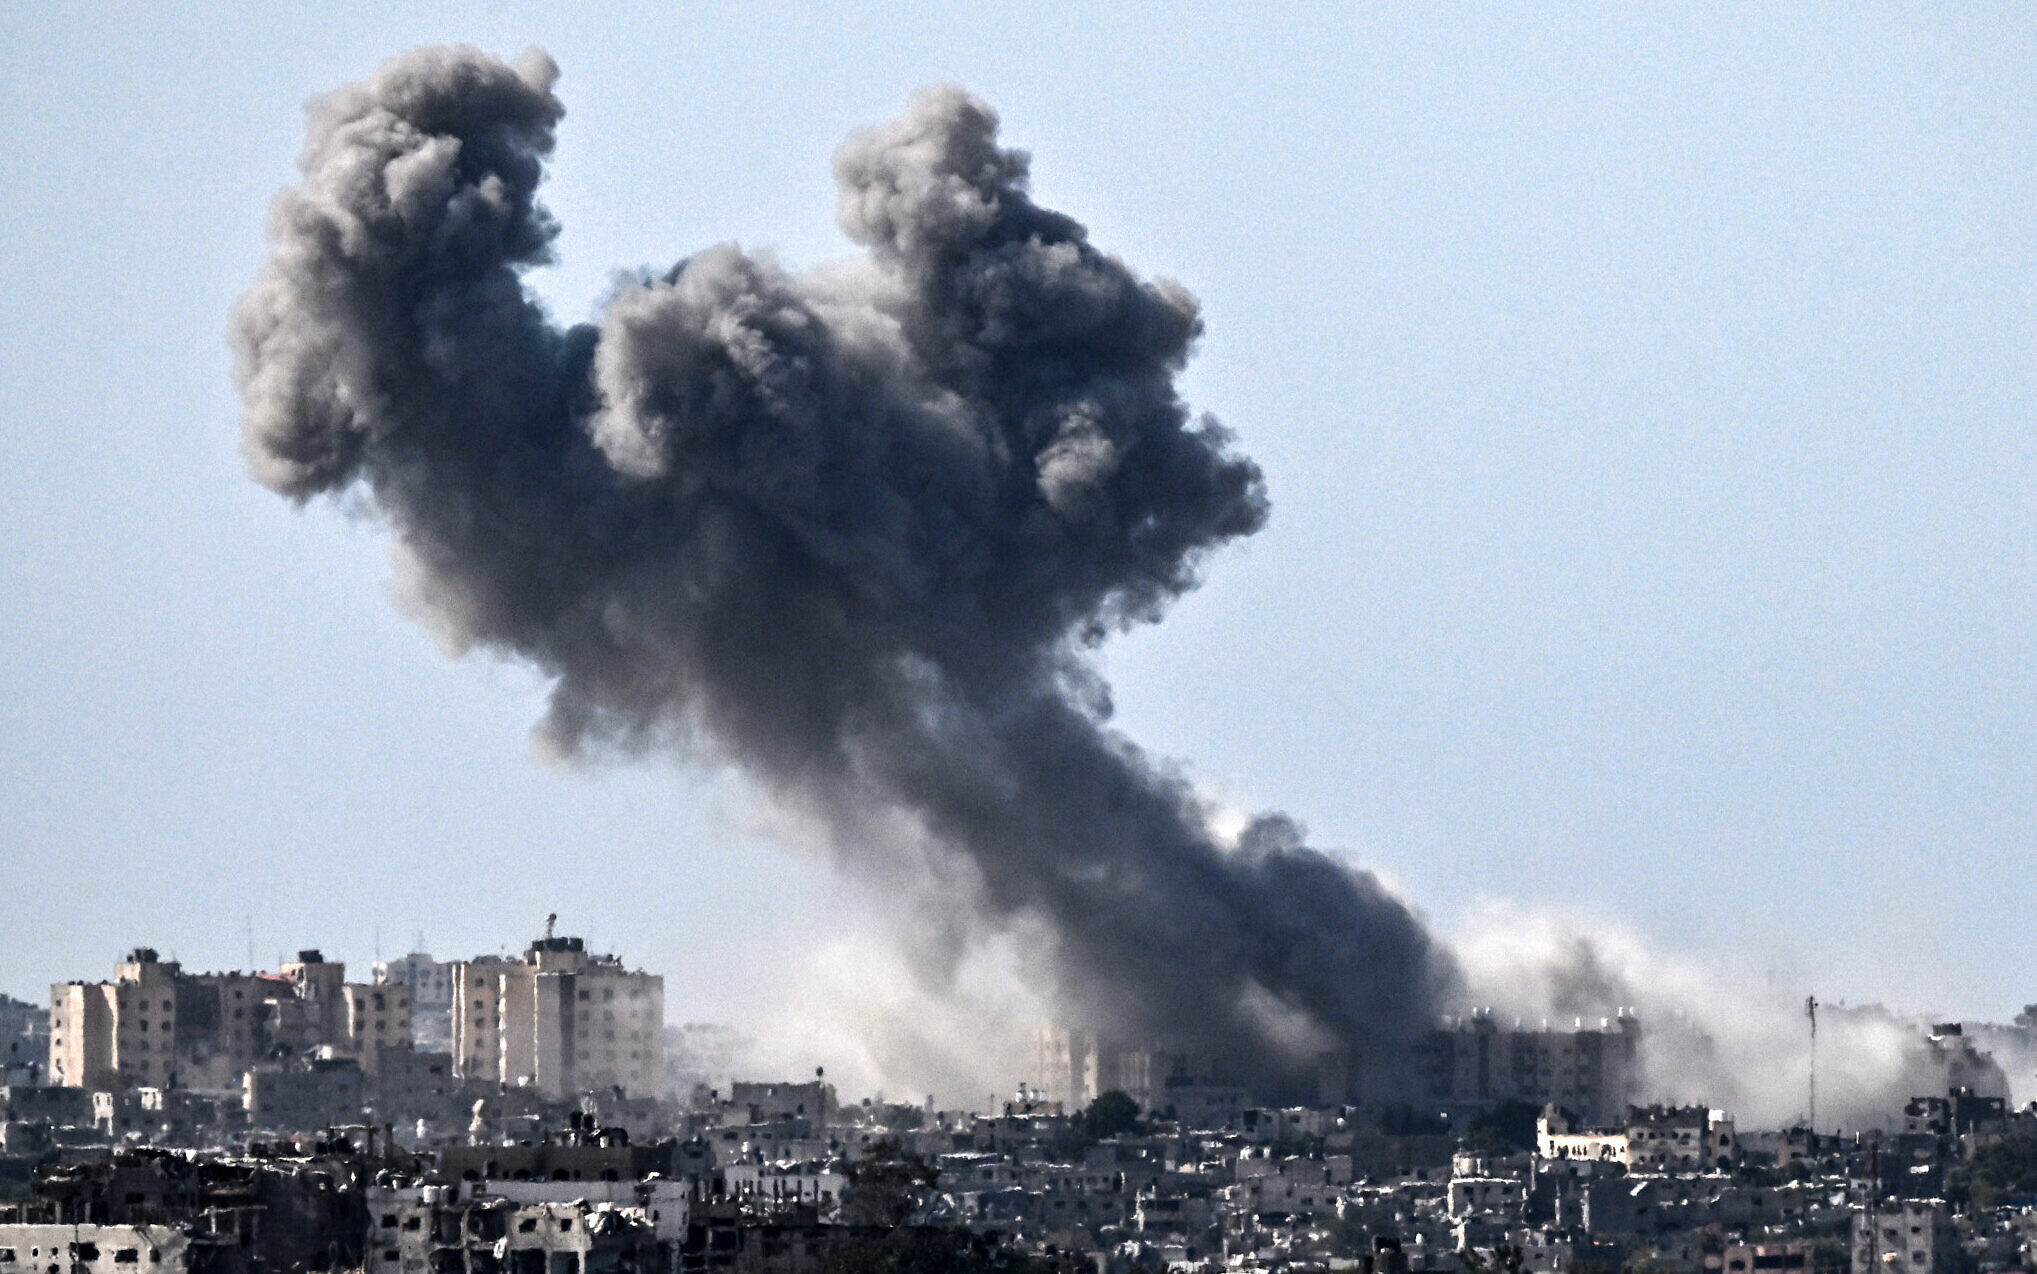
Mosab Hassan Yousef, the son of Hamas co-founder Sheikh Hassan Yousef and who was once associated with the Palestinian terror
Read More
New Delhi: Indians have vast options for investing. The availability of a plethora of options creates confusion among investors about the
Read MoreIn a bid to assist users in identifying issues with their Pixel phones, Google is launching a diagnostic tool. Users
Read More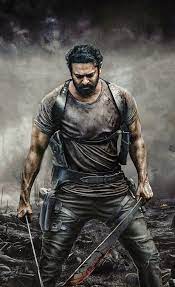
New Delhi: Ahead of the much-awaited release of ‘Salaar Part 1: CeaseFire’, Prabhas has made some noteworthy relevations about the
Read More
BlackBerry has appointed John Giamatteo, the president of its cybersecurity division, as the new CEO and board member. This decision
Read More
Tesla Recalling Over 2 Million Cars Over Autopilot Safety Fault EV maker Tesla is issuing a recall for more than
Read More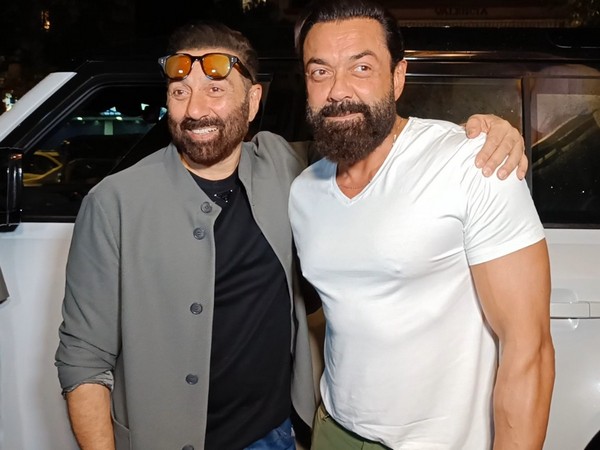
Mumbai: Sunny Deol says he is happy with the praise his brother Bobby is receiving for his performance in “Animal”,
Read More
Delhi Mayor Shelly Oberoi on Friday claimed that her Facebook account has been hacked. Speaking on the meatter, an official
Read More
On the other hand, it was a much-improved performance from Pakistan on Day 2. Although, the pacers had some difficulties
Read More
Rudy Giuliani must pay more than $148 million in damages to two former Georgia election workers he defamed through false
Read More
A far-right Israeli leader and a heritage minister in the Benjamin Netanyahu-led government on Friday (local time) said that Israel
Read More
New Delhi: December 15 was an unconventional night in Mumbai. Of course, Bollywood celebs have graced another event but it’s
Read More
The print media of Canada will receive nearly two-thirds of an annual payment of 75 million USD from Google in
Read More
Legendary Argentine player Lionel Messi’s FIFA World Cup shirts have been sold for a record price in a New York
Read More
India head coach Rahul Dravid will not be at the helm of the Indian team in their 3-match ODI series
Read More
Barbara Furlow-Smiles, a former global head of Diversity, Equity, and Inclusion at Facebook, admitted to embezzling over $4 million (approximately
Read More
New Delhi: There has been a buzz on social media about the Indian Banks Association (IBA) proposing a five-day working week,
Read More
A 10-inch-thick binder consisting of around 3,000 pages of top-secret material linked to the US probe of Russia’s interference in
Read More
New Delhi: In the last month of the ongoing year i.e. 2023, several prominent banks in India, including Canara Bank, IDBI
Read More
Salt is common in kitchens, but its consumption has been controversial in the medical sector. While salt is vital to
Read More
SA vs IND: Mohammed Shami ruled out of Test series, Deepak Chahar withdraws from ODIs
Read More
(By Dr Praveen P Sadarmin, who is a Consultant – Cardiology – Adult at Narayana Health City Bangalore) As winter’s
Read More
Indian-American Vivek Ramaswamy, a Republican contender in the US Presidential race, was questioned about his religion as he appeared on
Read More
New Delhi: Hombale Films is unquestionably one of the most prestigious content creators in Indian film. The prominent production, which has
Read More
Harmanpreet Kaur got out in a bizarre manner in the first innings of the Only Test between India and England
Read More
Cameras on smartphones have come a very long way and have managed to replace digital cameras in our lives to
Read More
Kia Sonet has managed to secure big marks for its ease of ownership experience, as the SUV is said to
Read More
New Delhi: Infosys founder Narayana Murthy’s two new deepfake videos, which are being shared on social media, purportedly promoting a
Read More
As Trade Ministers from Switzerland and Norway concluded their visit to Delhi this week, they remain optimistic about reaching an
Read More
Prime Minister Narendra Modi is expected to announce the launch of one more Vande Bharat Express train between Varanasi and
Read More
David Warner’s wife Candice shared a cryptic one-word post directed at former Australia pacer Mitchell Johnson after the star opener
Read More
You would have certainly seen these images of Twitter top boss Elon Musk holding a humanoid go viral with a
Read More
Stéphane Bancel is alive. The baseless story about his alleged hanging was published by Real Raw News, a website known
Read More
Inspired by AR Rahman, Theory band crafted the medley, showcasing their admiration for the acclaimed composer.
Read More
A stranger accused of breaking into the home of a Detroit synagogue leader was charged with her murder Wednesday, nearly
Read More
A US judge on Wednesday paused the federal case accusing Donald Trump of attempting to illegally overturn the results of
Read More
New Delhi: In the competitive world of job hunting, one Kolkata-based candidate has taken a bold and humorous approach to stand
Read More
New Delhi: As the mist carries the tune of the classic “Tu hi re,” a quirky tale unfolds in the quaint
Read More
Star opener David Warner hit a counter-attacking 164 as Australia dominated day one of the first Test against Pakistan in
Read More
The Supreme Court agreed on Wednesday to take up a dispute over a medication used in the most common method
Read More
New Delhi: Wholesale price-based inflation rose 0.26 percent in November compared to (-) 0.52 percent in October. WPI inflation, after
Read More
A woman imprisoned for 20 years over the deaths of her four children, and pardoned in June, saw her convictions
Read More
As the engine roars amid majestic peaks, Sonu Sood blends adrenaline-pumping adventure with unwavering fitness. The mountainous terrain transforms from
Read More
Young England off-spinner Shoaib Bashir revealed that he ignored a missed call from a New Zealand dialling code number a
Read More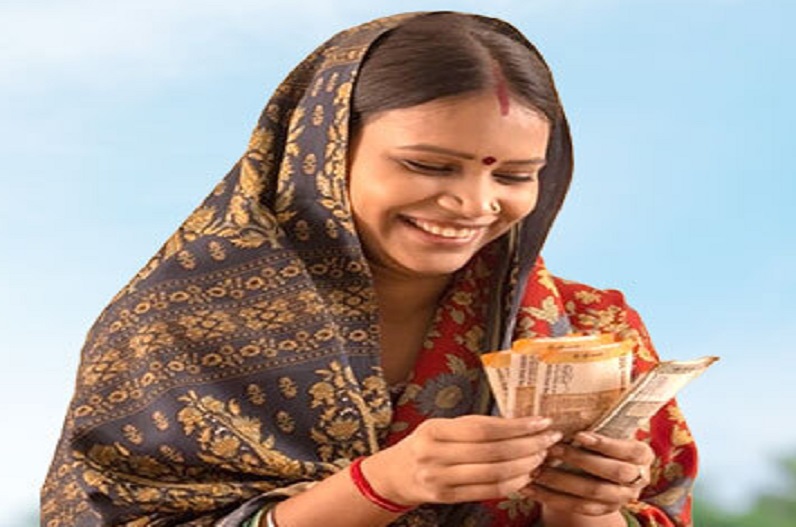
[ New Delhi: A Special Research Report released by the Economic Department of State Bank of India has analysed the
Read More
South Africa fast-bowler Kagiso Rabada will be skipping the domestic first-class fixtures as preparation for their upcoming Test series against
Read More
Shriya is known for her finesse with which her characters come to life and stay back long after its release.
Read More
Sunscreen is an essential part of any skincare routine, especially for those with oily skin. However, finding the right sunscreen
Read More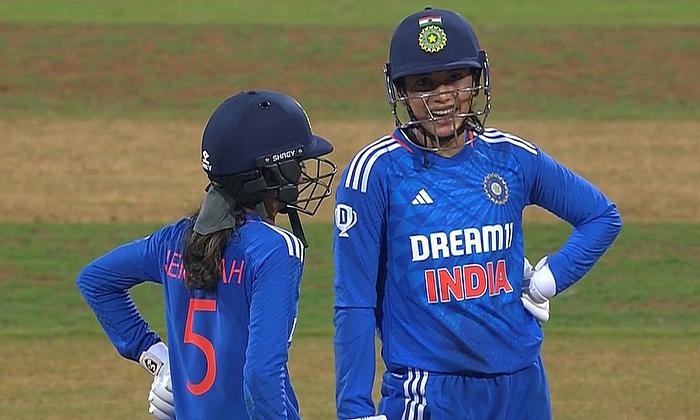
Young India women’s batter Shubha Satheesh marked her arrival in international cricket in style as she hit a stellar fifty
Read More
What’s possible in a week? If you dedicated seven days to the achievement of one goal, how ambitious could you
Read More
What’s possible in a week? If you dedicated seven days to the achievement of one goal, how ambitious could you
Read More
Key Learning Outcomes At the end of this unit you will be able to: 1. Explain the meaning of health 2. List common health problems 3. Discuss techniques for preventing common health problems 4 Explain the meaning of Health Hygiene 5. Know the purpose of Swacch Bharat Abhiyan 6.Explain the meaning of habits Discuss ways to create a safe work environment 8. Discuss key safety habits that employees should follow 9. Explain the importance of self-analysis 10. Understand the motivation using Maslow’s Hierarchy of Needs 11 Discuss the meaning of achievement motivation 12.List the characteristics of a successful-motivated entrepreneur 13. List the different factors that motivate you 14 Discuss how to maintain a positive attitude 15 Discuss the role of attitude in self-analysis 16. List your strengths 17 Discuss the characteristics of an honest person 18 Describe the importance of honesty to an entrepreneur 19 Discuss the elements of a strong work ethic 20. Discuss how to promote a good work ethic 4 of 4 Size 4 Creative Traits 4 22 List Height Traits of Innovative People 23.
Read More
In addition to following these hygiene habits, it is important to maintain good health Physical condition is the result of regular exercise Xerosis can take many forms Jogging Morning walks Lifting weights. Gym, swim bike, yoga and more. The benefits of good health . It maintains an optimal weight of . It reduces the risk of disease:.It increases confidence and self-esteem . It reduces stress, anxiety and depression Healthy eating habits We can follow good hygiene habits and exercise regularly, but what we eat has the biggest impact on our health. good health, you have to eat healthy. But what do we mean by healthy eating? A healthy and balanced diet nourishes our body. These nutrients give us energy, keep our brain active and our muscles working.What are healthy eating habits?. Always try to eat homemade foods. Avoid fatty foods. Always cook and eat fresh foods.• Avoid junk food, such as burgers, soft drinks and so on.. Often eats fruit . Drink plenty of water Things to avoid Certain habits have serious adverse health effects These habits must be avoided in order to live a healthy life. Alcoholism This is a tendency to drink alcohol to solve a problem or to not feel bad.Alcohol has the potential to damage almost every organ in the body and the brain. Uncontrolled drinking can affect not only the drinker’s health, but also their relationships and social status. its effect: . Health Increased risk of heart disease, cancer, weakened immune system, liver infection (cirrhosis), etc.. Decreased concentration at work, decreased performance Degraded socioeconomic status . Withdrawal symptoms such as anxiety, tremors, fatigue, headaches and depression. Tobacco Tobacco is the second leading cause of death worldwide. He claims that a person dies every six seconds. Smoking is the act of burning a substance and inhaling the smoke it produces.Common smoking accessories include cigarettes, bidis, hookahs, and pipes. According to reports, there are 4.9 million people in the world every year due to smoking, which is the leading cause of lung cancer. According to one study, male smokers lose an average of 13.2 years of life, while female smokers lose 14.5 years of life. Smoking makes you 50 times more likely to develop heart disease than non-smokers.Chewing tobacco is a product that is consumed by placing a portion on the cheek and between the upper gum or upper superficial teeth and chewing. Smoking increases the risk of mouth cancer.
Read More
The organizer4Import settings (style, color and display size)⇓initial quality control⇓⇓⇓Ironing/PERS⇓⇓⇓ 444 Wise44 Metal inspection Wise44 WisePressure Equipment:Steam Irons:Steam Irons:Homework often uses electricity. But today, steam irons are used for industrial purposes. In cast iron, the iron is heated by steam supplied by a central boiler or a small boiler. The steam supply is regulated by a manual adjustment knob. This steam is carried from the boiler to the iron and exits through the perforations located under the iron.These irons are triangular in shape and their weight varies from 1 kg to 15 kg. To iron this iron, a bed or ironing board is needed. There must be a vacuum system next to the bed. After ironing, press the pedal to suck the air out, which can also quickly remove moisture and heat from the printed garment. To operate a steam iron requires a skilled and experienced operator.Steam Press Process Flowchart:Apply steam from BUCK⇓HEAD moves closer to compress clothes⇓Can apply more steam from HEAD or BUCK⇓Head 4 is released 4 4 4 Cylinder 4 is released to cool and dry clothes Folding:In the garment industry, finishing is the process that includes printing or ironing, folding and pressing. clothing packaging. Folding again is done by ironing. After printing, the process of folding the garment into the desired size and shape is called folding.types of packaging and folding:folders have the following four types of packaging and folding:1.Standing Suit: The collar is bent at a 900 angle to the body.2. Semi-upright: The collar is folded over and forms an angle of 450 with the body.3. Flat suit: Suit with the collar folded completely flat on the body.4. Hanger bag: Hang the shirt on the hanger and pack it in the box. ● SavePackaging:packaging is always done in cartons, and there are several standards for clothing packaging as follows, There are generally two types of clothing packaging,1. Garments are individually wrapped/wrapped in a plastic bag, The design of the plastic bag is specified by the buyer. I.For example, pack it with a hanger or an ordinary plastic bag, then put the whole garment (according to the packing standard) in a carton. 2. Another way is to fold clothes and put them in cardboard boxes instead of plastic bags.Each carton follows the packing standard as shown before and is made in a different way as shown below1.Solid Fill 2.Proportional Fill 3.Mixed Fill 1. Solid Packing: In this packing method, the carton will contain clothes of one color and same size. For example, 20 shirts of a similar color, say navy and size S, would be a case of.2. Proportional packing: In this way,pieces of garments of the same color but different sizes are filled into cartons in proportion.For example, S:M:L:XL=5:7:7:5.3. Mixed packing: packing clothes of different colors but same size in cartons, or clothes of different colors and different sizes , mixed in a certain proportion.After packing finished, clothes keep in warehouse/store until buyer send buyer QC to inspect before shipping, once QC arrives, they will check as per 2.5 grade AQL will then check whether the garment should be accepted or rejected. Storage SOP:● First, the clothes are received wisely. Hourly listeners randomly sample pieces, check feel and tint; iron roughly and check the measurements. If there is a problem, Finishing In-Control is notified immediately and the rags are sent for rewashing.● 100% process thread trimming is complete.● 100% process inspection is done by on-site Q/C. Defective garments will be modified/rejected based on the type, size and location of the defect.● Ironing done in side passage● 100% process inspection done by Top Side Q/C for quality and measurements.Defective garments will be modified/rejected based on the type, size and location of the defect.● All accessories come with a bag liner and are sorted by color and size to ensure each box only contains garments of the same color.● Timing verifiers verify 12 items per batch per hour, and measure and verify 3 items per hour.● An internal audit follows. Auditors check 32 items twice a day (before lunch and after lunch).Auditors also check the quality and size of each size covering all colors.• 100% externally inspected to confirm packaging accuracy.● At the end of this CT PAT (Customs Trade Partnership Against Terrorism) audit. Following this process, there will be a pre-final inspection.● Pre-qualify the quality and measurement of packaged products based on AQL 2.5 systems per set.● If any of the above quality checks fail, it is returned to the first operation, threading and the full cycle is reworked.● After passing the preliminaries, the quality and measurement of the packed goods will be inspected by the buyer according to NQA 2.5 systems.● The buyer can only deliver the goods after passing the inspection. Finishing Section Report: Eight Reports in Finishing Section:1. Finishing Quality Inspection Report2. Style/Line OQL Summary3.Hourly final audit report4. Measurement table adjustment audit report (by Q/C)5. Measurement table adjustment audit report (by auditor)6. line/final inspection7. Weekly root cause analysis chart8.Finishing Q/C, Iron Man and Folding Man Consulting ReportFinishing Process – Shipping DocumentsAutogarment has an independent sales department to arrange and prepare shipping documents for smooth delivery of goods to our buyers. The Department of Commerce checks all relevant shipping documents against a checklist before shipping the goods.Autogarment prepares shipping documents at various stages according to the following procedures:1. When the goods are ready for shipment, PROJECT STITCH will immediately contact the buyer’s nominated freight forwarder to obtain a booking confirmation and fill in the details. Based on the above, PROJEKSTEEK starts preparing the shipping documents.2. Send the goods to the freight forwarder with the invoice and the packing slip signed by the sales manager.3. Prepare and arrange commercial invoice, final packing list, multi-country customs declaration, manufacturer’s certificate, certificate of origin, garment details and bill of lading to freight forwarder. The above documents are reviewed and signed by the business manager. 4. Before sending the above documents to the forwarder, the export company personnel check the documents through the defined checklist (if the specific buyer has a checklist, it is also compliant), the checklist bears the signature of the personal correspondent for the accuracy of the document. If they find any inconsistencies in the documents, they notify the appropriate staff to make corrections or corrections. Only then will the document be submitted to the trade manager for a final check to confirm its signature. The sales manager only approves if he finds no discrepancies in the document as a finalization processHere are some suggestions on what to wear to the lab. Additional information is available on the EHS website or on the EHS PPE online training modules.Standard laboratory uniform• Coverall covering torso and arms.● Underwear covering the entire leg up to the ankle (for example,, pants, skirts, coveralls, lab coats) and adequately protect exposed skin.● Five-toed footwear covering the instep, made of leather or synthetic leather or other material that prevents spills or rapid penetration of sharp objects.● In laboratories where there is a risk of fire, avoid clothing made of synthetic fibers such as nylon, polyester, polypropylene, or acrylic, which will melt when ignited. Wear non-flammable natural fibers such as wool, cotton, jute, linen and silk.Standard Personal Protective Equipment Lab Coat:● Long-sleeved lab coat, or gown or coverall, with ribbed cuffs, made of flame retardant material.● Chemical resistant aprons and sleeves for handling caustics and chemicals that are toxic when absorbed through the skin.Eye protection:● Safety glasses with side shields.● Protective goggles for handling chemicals that can damage the eyes.● Wear goggles with a face shield when the risk of injury is high.Gloves:● Examination gloves are suitable for daily laboratory activities.● To avoid exposure to toxic chemicals, use gloves specifically designed for the hazard or chemical.Hearing protection:● If you are unable to communicate easily with others within one meter, the noise level may exceed safe levels. Consult EHS for noise exposure rating and hearing protection recommendations. Respirator:● Consult EHS if you intend to use a respirator, even if it is only a filtering mask. Respirators must be used under certain conditions, and EHS personnel can ensure that you are using the correct respirator for the type of work you plan to perform.!
Read More
1. Visual Identity Graphic DesignBranding is the relationship between a business or organization and its audience. A brand identity is how an organization communicates its personality, tone and essence, as well as its memories, emotions and experiences. Visual identity design is just that: the visual elements of brand identity act as the face of thebrand, communicating these intangible qualities through imagery, form and color. Designers specializing in visual identity graphics work with brand stakeholders to create assets and image libraries that represent the brand personality.In addition to standard business cards and corporate stationery, designers often develop a set of visual brand guidelines that outline best practices and provide examples of visual branding applied to various media. These guidelines help ensure brand consistency in future applications.Corporate identity design is one of the most common types of design. A visual identity designer should have a general knowledge of all types of graphic design in order to create design elements suitable for use in all visual media. They also need excellent communication, conceptual and creative skills, and a passion for researching industries, organizations, trends and competitors.2. Graphic Design for Marketing and Advertising When most people think of graphic design, they think of designs made for marketing and advertising. Companies rely on successful marketing efforts to understand the decision- making process of their target audience. Good marketing engages people based on their wants, needs, awareness, and satisfaction with a product, service, or brand. Since people will always find visual content more appealing, graphic design can help organizations advertise and communicate more effectively.Marketing designers work with business owners, directors, managers, or marketing professionals to create assets for marketing strategies. They can work individually or as part of an internal or creative team. Designers can specialize in a specific type of media (like car wraps or magazine ads) or create a variety of promotional materials for print, digital, and more. Although traditionally focused on print, this type of design has grown to include more digital assets, especially for content marketing and digital advertising. Magazine & Newspaper Ads Posters, Banners & BillboardsInfographicsSigns 4 Packs & 4 Brochures 4 Packs & 4 Brochure StandsEmail Marketing TemplatesPowerPoint PresentationsMenusSocial Media Ads, Banners & GraphicsBanners & Redirects Website & Blog GraphicsMarketing Designers Need Excellent Communication Skills, Problem Solving and time management.In addition to mastering various graphic design, layout and presentation applications, they should be familiar with production for print and online environments. Entry-level positions in this field are a great way for new designers to learn the process and gain valuable skills and experience.3. User Interface Graphic DesignA user interface (UI) is the way a user interacts with a device or application. UI design is the process of designing an interface so that it is easy to use and provides a user-friendly experience. UI includes everything a user interacts with – the screen, keyboard, and mouse – but in the context of graphic design, UI design focuses on the visual experience of the user. and the design of on-screen graphical elements, such as buttons, menus, micro-interactions, and more. Balancing aesthetic appeal and technical functionality is the job of the UI designer.designers specializing in desktop applications, mobile applications, web applications and games. They work closely with UX (user experience) designers (who decide how the app works) and UI developers (who write the code to make it work).User Interface Graphic Design Example● Web Design● Theme Design (WordPress, Shopify, etc.))● Game Interface● Application Design UI Designer should be a team player with rigorous graphic design skills and a solid understanding of UI/UX principles, responsive design and web development. In addition to graphical applications, they require knowledge of programming languages such as HTML, CSS, and JavaScript.4. Graphic design of publicationsPublications are long articles that communicate with an audience through public distribution. These are traditionally print media.Publication design is a classic type of design – think newspapers and catalogs. Recently, however, digital publishing has grown considerably.Graphic designers specializing in publications work with editors and publishers to create page layouts using carefully selected typography and accompanying artwork, including photographs, charts, and illustrations. A publication designer can work as a freelancer, as part of a creative agency, or in-house as part of a publishing company.Graphic Design Examples for PublicationsBooksNewspapersNewslettersGuidesAnnual ReportsMagazinesCatalogsPublication designers should have excellent communication, layout and organizational skills. In addition to graphic design expertise, they must understand color management, printing, and digital publishing.5. Graphic design of packagingMost products require some form of packaging to protect them and prepare them for storage, distribution and sale. But packaging design can also communicate directly with consumers, making it an extremely valuable marketing tool.Each box, bottle and sachet, each jar, container or container is an opportunity to tell a brand story.Packaging designers create concepts, develop mock-ups and create printable files for products. This requires expertise in the printing process and a deep understanding of industrial design and manufacturing. With so many disciplines involved in packaging design, it’s not uncommon for designers to find themselves creating additional assets for a product, such as photography, illustration and visual identity. Packaging designers may be hobbyists or specialize in a specific type of packaging (like labels or cans) or in a specific industry (like food or children’s toys).Their work requires excellent conceptual and problem-solving skills, as well as a solid working knowledge of printing and industrial design. They should be flexible to meet the needs of customers, marketers, and manufacturers, and understand6. Designing Motion GraphicsSimply put, motion graphics are graphics in motion. This may include animation, audio, typography, images, video, and other effects used in online media, television, and film. The media’s popularity has skyrocketed in recent years as technology has improved and video content has become king.“Motion Graphics Designer” is a relatively new profession for designers. Officially reserved for television and film, advances in technology have reduced production time and costs, making this art form more accessible and affordable. Motion graphics are now one of the latest design genres to be found on all digital platforms, creating all kinds of new territories and opportunities.Motion Graphics Design ExamplesTitle Sequence and End CreditsAnnouncementsAnimated LogosPreviewPresentationsPromotional VideoTutorial VideoGame WebsiteG4 IF GameBannerMotion Graphics Start by developing a storyboard, then bring their concept to life through animation, video and traditional art. Depending on the industry, a strong working knowledge of marketing, coding and 3D modeling can be a definite plus.7. Environmental Graphic DesignEnvironmental graphic design visually connects people and places, enhancing their overall experience by making spaces more memorable, interesting, informative, or easier to navigate. Environmental design is a broad type of design, here are some examples:Environmental Graphic Design Examples1. Signage2. Murals3.Museum display4. Office branding5. Public transport navigation6. Retail store interior design7. Stadium branding8. Event and Meeting SpacesWayfinding is a specific type of environmental graphic design consisting of strategic signage, landmarks and visual cues that help people identify where they are and where they need to go so they can navigate get there without confusion.Environmental graphic design is a multidisciplinary practice integrating graphic, architectural, interior, landscape and industrial design. Designers work with many people in these fields to plan and implement their designs. Therefore, designers usually have training and experience in both graphic design and architecture. They must be familiar with industrial design concepts and be able to read and draw architectural plans.Environmental graphic design has traditionally produced static impressions, but digital interactive displays are gaining popularity as a way to create more engaging experiences.8. Art and illustration in graphic designGraphic art and illustration are often considered the same as graphic design, but they are quite different. Designers create works to communicate and solve problems, and graphic designers and illustrators create original works of art. Their art has taken many forms, from fine art to decoration to illustration for storytelling. Although graphic art and illustration are not technically types of graphic design, there are so many things created for commercial purposes in the context of graphic design that you can’t talk about them per se. Graphic Design Art & Sample IllustrationsT-Shirt DesignTextile GraphicsMotion GraphicsStock ImagesGraphic NovelsVideo Games4 Website Art4 Website ArtBook CoversPicture BooksInfographicsTechnical IllustrationConcept Art Graphic designers use any combination of media and technology to create their work while working with writers, editors, managers, marketers and art directors in all fields type cooperation in graphic design. They usually have a background in fine art, animation or architecture. Overlapping skills and applications make it possible to find graphic designers who work as both graphic designers and illustrators (or vice versa).Using the right kind of graphic design for the job Graphic design is a growing field and the demand for professional and skilled designers is on the rise.Knowing the different types of graphic design will help you identify the specialists you need when looking for the right people to work indesign The importance of fashion illustration in fashion design Fashion illustration constitutes the initial look of each design. It can be defined as the basic transformation of ideas into creative designs using diagrams and drawings. Fashion illustration is a visual way to explain different design ideas. They have played a key role in fashion design since the evolution of clothing. Over the years, each fashion designer has developed their unique style of fashion sketching.This eventually became their signature sketching style, which you can instantly recognize from their sketches.Fashion design in a nutshell is the art through which fashion and design are explained, presented and communicated. Now that you know what fashion illustration is, you can hopefully wonder how important it is to the typical fashion designer. Well, the following points can give you a clear understanding in this regard.It helps to visualize ideasFashion illustration helps a designer bring his ideas to life. This in turn helps to visualize design ideas and concepts. Visual aids such as diagrams and pictures contain information and become a communication medium for designers. Illustrations reveal important details that require more care and attention. These fashion sketches detail the design of the garment, the flow of the fabric, the cut and the necessary pleats. They form the basis on which the entire approach to planning and designing a particular garment or accessory rests.This is the first step in fashion designEvery journey to delivering a fashion product begins with a fashion design. Nothing can be done without it. Creative illustrations for fashion designers are the first image of the whole design process. Sketching the design is one of the first tasks in the step-by-step process leading to the final design. Any design-related changes can be made to these figure drawings, and you can also see if the design concept is correct when assembled into the clothes!He advocates and spreads a whole new trendThrough fashion illustrations, designers can really let go of their ideas. They are free to explore their own ideas and desires. Fashion design illustration helps designers create new concepts by truly showcasing their unique and authentic ideas. It brings new fashion trends to life. Fashion illustration ideas help spread a new sense of fashion.Fashion sketches are a blank canvas for fashion designers to play with and let their wildest ideas run wild. Since this is a brainstorming process, you minimize wasted resources because you can fix your design before you start!Also Read: Fashion Design and Some Important Tips to FollowThis Represents the Creative Skills of a Fashion DesignerA fashion designer needs a place to express their unique thoughts and ideas. Illustrations for fashion designers give them a platform to showcase their creativity. They also help in judging how a particular designer’s design stands out from others.Fashion diagrams make it easy to identify the potential of fashion designers. By looking at their fashion sketches, it is possible to understand the thought process of a designer. It helps attract new customersWhen it comes to branded clothing, customers are always on the lookout for something new. So when a new series comes out, they’re sure to expect something they’ve never seen before. Fashion sketches and fashion illustrations may be released ahead of their collections to build tension.This keeps customers interested in seeing the product in action, while giving customers insight.Since illustration is such an important part of fashion design, it is important for any aspiring fashion designer to study fashion drawing. Every fashion design course in India or anywhere in the world focuses on improving illustration skills and starting a design course, there are courses on the subject. You need a fashion design course to bring your fashion illustration ideas to life. If you are passionate about improving your illustration and fashion design skills with fashion design courses in Hyderabad, then Hamstech is the place to go.You can learn how to draw and sketch fashion with the help of all the practical lessons and homework in this fashion design course. Here, industry experts and renowned tutors help you learn the art of fashion in the easiest and most convenient way. You can register for this course right now by logging into our official website. You will also find all the details about the fee structure and the program there. Good design!Flowchart of Garment Printing Finishing Equipment After Garment FoldingPacking and Folding Types________________________________________ Garment Finishing:Finishing department is the department that comes after all departments and it plays an equally important role in the final look of the garment This section mainly includes the following 4 steps : 1.4 Trim2. Check3. Half press4.Print5. Mark1. Trim: This involves removing excess thread from the sewn area of the garment.2. Inspection: The inspection performed here complies with AQL 2.5, Sometimes it also depends on the buyer, that is, if the buyer insists on 100% inspection, the company should do it as stipulated.3. Half Pressed: This occurs when a garment comes from the laundry service and is difficult to verify in print. So they partially press the garment, then check and cut it, then send it out after the pressing process is complete.4. Pressing: Pressing is done after the garment is fully inspected, and thegarment is pressed by the folding method during the packaging process.5. Tagging: After a garment has been inspected and stamped, it is sent for tagging, which includes size tags, price tags, and miscellaneous tags (if the buyer chooses). Once labeled, the garments are folded to the buyer’s specifications.Printing Principle:The process of removing unwanted creases and creases from a garment while improving its appearance is called printing. This is also known as ironing. In the clothing industry, there is a separate section for ironing products. This is usually done with a hot plate and an iron while the clothes are damp.Print object:1.
Read More
You l ook your best when you wear what’s in season. Especially if you live in a country with 5 seasons, you understand that with each change of season, your dressing process also changes. Each season has several sets of different styles depending on its climate. Keeping this in mind, you should change the way you dress according to each season and adapt to the changing clothes you wear. Different seasons have different altitudes and climatic conditions.With that in mind, buy clothes online that you need to wear separately so they keep you comfortable all year round. Every season you also have the opportunity to recycle or renovate your wardrobe. Every season or every occasion you need a different type of clothing. Different seasons can also help you try on different clothes and help you decide your own style. Now, when it comes to deciding your style, you have to consider a lot of things that will help you decide and stand out.Summer and winter are two seasons when the temperature is too high. At this time, clothes can not only play the role of appreciation, but also help you survive the severe cold or scorching heat. The selection of appropriate supplies and materials is of the highest quality and should be in keeping with the season. Do not turn to high-end coats and tweeds, mohair or cashmere for the winter, they will certainly protect you from the cold. To continue having a style nowadays, accessories will be your most precious partner because you will have the power to transform the look with shawls, hats, mittens and handbags.Throughout the summer, it will be more comfortable to wear a stylish look with a little flowing and well-tailored dress, or light denim shorts. There’s no need to be overly generous, but accessorizing with tow charms is enough to look confident.Season andClothing As mentioned above, it is necessary to dress according to the weather or the season because it will not only protect you from the weather but also give your wardrobe a new look. At Idalia you will find clothes for every season for your holiday and office looks. Get kurta suits online at Idalia, an online portal for all types of modern ethnic clothing.There are five seasons, so you have to dress, and for that you have to dress.Now let’s talk about clothing according to the following five seasons:1. Summer: Summer is the time of the sun. This is the busiest time of the year. Light and adapted clothes are preferable in summer.As the heat heats up, summer will be the season to hit the beach or the nearby pool in these two swimsuits. In the summer, you’re sure to see casual tank tops, lightweight sweaters, shorts, bright tees, and slippers. It’s a single season that doesn’t require diapers. Find classic women’s suits, summer dresses, pair them with your favorite loafers, go the extra mile and follow the trends. Summer dresses never go out of style.2. Spring: Spring comes at the same time, the climate is hot and rainy. It is still very cold in early spring, because early spring is winter. Coats, sweaters and shawls can be very useful when preparing for the start of spring. As spring approaches, you can ditch your warm clothes for more modest coats and long-sleeved blouses.Spring is the season to support wearing bright, vibrant colors. It is the season of rebirth, as the flowers bloom. So feel free to express yourself with fun and colorful attributes.3. Winter: Winter is the coldest time of the year.In winter, be sure to wear warm clothes to avoid winter frostbite. Wear cozy coats, jackets and sweaters to stay warm. Scarves, gloves, stockings, hats and earmuffs can also be used to add more winter minions for added warmth. Wear layers of clothing, as weather protection is important.4. Fall: When it comes to dressing for the fall semester, layers are important. Fall is the season of browns, oranges, and all kinds of pastel, comforting colors. Jackets, ponchos and overcoats are particularly popular during this period called autumn. Incorporate multiple versatile shapes and layers for a contemporary look. Boots are the shoe type of choice, especially in the fall.5. Rain: The fifth season is the rainy season. In the rainy season, people prefer to wear clothes that are not too excessive and comfortable. For this season, one can choose clothes that are not long but at the same time suitable for the occasion and the outfit. Especially on rainy days when you have to go out, it is better to wear knee-length or ankle-length clothes, which are recommended by all stylists.The above are the best ways to categorize what to wear all year round. It is always advisable to plan your outfits in advance so that you do not have to look for them at the last minute. When it comes to traditional seasonal clothing, Idalia offers a great selection of clothes to keep you comfortable and stylish at all times. During rainy seasons and festivals, the kurta with skirts on our online portal is the best choice for you. ConclusionIt’s always amazing to experience the seasons, and it’s even more fun to dress according to the respective season.At Idalia you can find a wide range of kurtas with wide pants and choose the style that best suits your daily commute to work and celebrations. All of our designers always keep all their customers’ wishes in mind and design all those clothes that will make everyone stand out and stay fashionable at all times. The seasons change, but you will always wear and can wear the great selection of clothes we have prepared for you. All these outfits available on our online portal are designed in different sizes and colors, and you can keep them for everyday life, parties and family gatherings. With the type of weather in mind, now with Idalia you can easily store all types of clothes in your wardrobe.You can also gift our clothes to your female friends and colleagues and brighten up their day with our great collection of clothes. Fancy a wardrobe makeover? Idalia is perfect for you. In addition to ethnic clothing, we also have western clothing suitable for your outings and travel plans. Our patterns and prints are unique and y’t find them anywhere else.All of our garments are made from durable, high quality materials. We wish you the best possible meeting with us and we hope to see you soon. Take care Garments Quality Check Points and Their Quality ControlGarments QC/QA Check Points: There are four sections During the quality control process of the garment, it creates defects during the manufacturing process, part cutting, sewing, washing and finishing, there must be standards for the quality control team to check the product quality of the garment. This article clearly shows the quality control standards of each quality control point in the garment factory and briefly describes the quality requirements of garments. I hope after reading this article, you will have a good understanding of garment quality checkpoints and their quality control.Garment quality checkpoint by department1. Cutting quality checkpoint2. Sewing quality checkpoint3. Washing quality checkpoint4. CheckpointFinishing Quality Checkpoint Garment Quality Checkpoint and itsInspection Standard is better for you to better understand the job descriptions of different garment quality control departments.Manufacturing Quality Checkpoint1. Fabric inside out: Make sure the fabric is not inside out.2. Fabric slope: The maximum slope of 2 cm for a 60 cm bust is acceptable and cannot be exceeded. This defect can be corrected by repairing the fabric at the fabric factory.3. Relaxation: Knitted and stretch fabrics should be relaxed for approximately 12-24 hours or more before cutting, depending on the type of fabric. The stretchy fabric should relax.4. Pile Height: The higher the pile is on the head, the more likely it is that the size of the chips will be uneven.This can cause sizing and fit issues. Make sure the height is appropriate for the type of fabric (usually 2 to 3 inches, never more than 5 inches).5. Numbering and grouping: Make sure that the different pieces are numbered correctly to avoid shadows and that the numbering can be easily removed after the sewing is finished.6. Storage: Make sure that the various parts are stored correctly, as rolled up and not folded.Sewing process quality inspection points 1. Key operations: repeatedly check all key operations (such as sewing necklines, armholes, cuffs, closures, etc.), so that the operator clearly knows what needs to be done and how to do it. Repairs before finishing a lot of clothes.2.Labels must be applied correctly to 100% of garment size3. Check interfacing for adhesion strength when melting.4. Seam Allowance: Check operators again at this point to ensure they are using the correct seam allowance.5.Numbering: Make sure the person sewing puts together the same numbered pieces to avoid shadows.6. Confirm whether the garment structure and size are correct according to the batch sample.Water Washing Process Quality Checkpoint1. Washing method: ordinary water washing, stone washing, sand washing, enzyme washing.2. Bleaching method: stone bleaching, bleaching of clothes3. Any special process. For example.Repaint after washing4. Shade of blue thread5. Whiteness of white thread6. Final tone: bluish or yellowish7. Friction effect: contrast of blue thread and white thread8 .Smooth blue and white parts9. Hand feel10. Record seal sample identification and quality standard on final inspection report to ensure QC inspects lot to standard correct.11. Mark and sign all quality standards as an indication of proper quality control.12. If QC finds the following major defects, it will not be released.13. Color of approved tape14. Fabric defects and wax marks in areas of garment above the knee exceeding 1 inch15. abric defects and wax marks greater than 3″ on any part of the garmentFinishing process quality check points1. Button fasteners and buttons2. Printing3. Complete inspection of the quality of garment4. Packaging and cartoningButton fasteners ButtonsButton too loose/too tightButton does not close properly/damagedButton lacks plastic sealButton falls offNot enough dust to secure the buttonMarks on moldDamaged paintRust on buttonText not straight● Wrong position/no line/wrong spacing● Button missing when needed● Buttonhole too big or too small● Buttonhole not clean/wrong sewn/deformed/poor thread quality● Spare button missing or misplacedcheck print● shiny marker● not printed or printed incorrectly● must be ironed Avoid ez to fold the pigment-dyed fabrics until they are completely washed.Indeed, it leaves clearly visible marks on clothes after washing. After sewing, hang the garment on a hanger until washing begins.Garment quality controlGarment inspection for manufacturing defectsGarment 100% measured to ensure fitHeat seal peelingGarment final product confirmation quality controlGarment quality control packaging and carton quality and folding● Correct selection of cartons according to customer requirements● Inspection of packaging, sealing, binding and barcodeFinal inspection quality control pointAfter the cartons are finished, Garment Buyer QC performs a final quality inspection to assess the quality of the product. Final audit or inspection is the most important factor for a garment factory. The final audit is the final judgment on the quality of the buyer’s product, and the inspection calibrates the quality control of the entire garment factory.Garments cannot be shipped without final inspection. The final inspection report is the garment buyer’s proof of quality, a certificate issued by the factory on the quality of its final product, authorizing or denying shipment of the garment. There are specific quality control points for the final examination of the garment and I have listed them below.Quality inspection criteria for final review1. Workmanship2.Appearance3. Dimensions/Accessories4. Materials5. Accessories6. Finishes/Packaging7. ManufacturingFusionSplitsBroken needlesMissing/skipping stitchesRepairEdged seamsIncorrect SPIDamaged/cut/punched needleStripping 44/T4P4 Trapped or up-downMisaligned/unsecured buttonBent stitchesEdges RoughLoose/KnottedButtonholesImproper TensionOpen/Bent Main TabLo44 4 Cut LinesLo44 4 Stitches Loose/Uncut ThreadsDirty MarksOil StainsWet ClothesTearsPurpleShiny4 Ply 4T 444 Covering 4 Stitches 4 4 Size 4 Size 4 Contrast FabricsPrinting/Paint ErrorsColor DifferencesBare StitchesHoles or CutsYarnsSlubsColor Fly/Exotic YarnsAccessories 4 L4/4 Yarns Main threadsMotors 4 /44 4 444 ZippersTapping/SealingScreen printing/BorideryButtons/Pressures/KnaelsVelcroLink s ElasFinishing/PackagingAssortmentAssortmentAssortment4 tickets ● 4 tickets ● 4 tickets ● 4 tickets ● 4 tickets ● 4 tickets 4 bar codes. Cardboard BarcodeIllustration and graphic design: what’s the difference?Art and design evolve much faster than we can imagine. Both are becoming increasingly accessible, making it difficult to confuse specific media.Well, for example, look at illustration and graphic design.Can you tell the two apart on a whim?To them the two are more or less the same thing. Indeed, it is easy to confuse illustration with graphic design, as the two mediums are closely related to art forms. It’s no surprise that many 20th century artists shuttled between the creative fields of illustration and graphic design.So what differentiates them from each other?This is the subject of this article.We take a closer look at the differences between illustration and motion graphics. let’s start! What is illustration?Illustrations explain an idea or tell a story or provide decoration by visually representing and interpreting text.This can be done manually or digitally – some software is involved.Drawing is one of the most widely used styles of illustration.Whether it’s a pencil drawing, a watercolor or even a charcoal drawing, you’ll find illustrations in most magazines, books, posters, manuals and pamphlets.In a world where everything is going digital, illustrations are created by hand and vector graphics. In this case, it is always created by hand directly on the computer.At Breadnbeyond Studios, our illustrators rely primarily on Adobe Illustration for their work to help our clients’ video marketing campaigns. This software helps illustrators to create very clean and scalable graphics.Since an illustration is a visual interpretation of a text, special attention must be paid to details such as the facial expressions of the characters in order to evoke deep emotion and connection. What is graphics?Graphic design is a more widely known type of design.It has a lot to do with composing and arranging the layout of text and images.So, while illustration is a creative visual interpretation, graphic design focuses on communicating with the target audience.Graphic design is essentially an art with a purpose – you could say it’s also about visually solving problems. He combines art and technology to convey ideas through images.Graphic design representing a particular idea or identity for use in advertising and promotion.So if you want to communicate a product or concept visually, you will use graphics to communicate your message.major studios, the most common software used to create designs for this industry is Adobe InDesign.Graphic design work areas such as branding, packaging, publishing, advertising and digital design using text, illustrations, symbols, photography, textures and colors.Illustrators vs. Graphic DesignerNow that we have understood the basic concepts of illustration and graphic design, we now move on to the professions that involve them: illustrators and graphic designers.There are key differences between graphic design and illustration roles, and I’ll let you know what types of projects graphic designers and illustrators work on.so you can decide which career path is right for you!Graphic Designers Graphic designers mainly work on many marketing and promotional materials such as layout, text, typography, images, illustrations and other graphic elements to make a polished production.It is more focused on creating a logo, creating marketing materials and branding. They primarily serve businesses for marketing or advertising purposes – the ultimate goal is to increase sales of a product and build brand awareness.Most of the times, graphic design jobs involve creating advertising materials in the form of posters, flyers, business cards, logos, email marketing, etc.Although sometimes they also do illustrators and Photoshop. But their main focus will be InDesign.The Internet also offers graphic designers a great opportunity to increase brand awareness through digital channels. By becoming user interface and user experience (UI/UX) designers, they can now create richer interactions between users, applications and games.Graphic designers always keep in mind that their job is to design and deliver a brand message. IllustratorAn illustrator, on the other hand, is someone who draws more. They enjoy conceptualizing and building on our art, ideas and themes.Unlike graphic designers who don’t necessarily know how to draw, their work comes from an original place because they are the original designers.Illustrators Create original hand-drawn or digital artwork (using a Wacom tablet, Cintiq, iPad or other device).It can convey an emotion or represent a current trend. Whether you want to deny it or not, illustrators need drawing skills.Illustrators may create commercial work for a company’s advertising projects – for example, designing product packaging. But they can also be good artists.They make things like magazine pages; they also do a lot of illustrations for book covers, graphic novels and infographics.That being said, there are still a lot of transitions between illustration and graphics. Many designers dabble in both.Video summarizing all the points above:Here’s a quick overview of illustration and graphic design. The two fields are closely related and often intertwined.Let’s put it this way: if you see an ad with a photo, logo, and eye-catching text, that’s graphic design, and if you see illustrations or sketches, that’s illustration.Now the question is: can one be more important than the other?Graphic designers are not more important than illustrators and vice versa. Both areas have their own unique functions and areas – if done well, they can still successfully convey an idea or message.So which job suits you best, illustrator or graphic designer?Do you have any other interesting facts about illustration or design graphics that you would like to share with our readers?Let us know in the comments below! What is mode communication?Fashion Communication is one of the newest and emerging fields in the fashion industry. Fashion is the fastest growing sector these days and many Indian brands are competing with international brands.This opens up huge possibilities for fashion communication designers, dealing with design strategy, branding, portfolios and more.He/she will also work in areas such as visual merchandising, styling, graphic design, display and exhibit design, advertising, public relations andfashion communication graduate students who will have a high level of skills and domain knowledge and will become a professional in providing effective communication solutions for the fashion and lifestyle industry.What is therange? Students will develop an understanding of the design process and how to apply a human-centered approach to problem solving. The best mix of traditional and new design skills are presented alongside topics such as the history of design and the creative process. Coursecovers areas such as graphic design, visual merchandising/retail experience design, exhibition and display design, event management, photography, styling, advertising, public relations and creative writing specific to the fashion and lifestyle industries.A good course in communication studies will expose you to web and multimedia design, computer graphics, illustration, product design, exhibit design, visualization and art direction, typography and photography.What are the career options?Fashion Communication students become dynamic professionals skilled in providing the most effective and economically viable communication solutions to the fashion and lifestyle industries. Covering a variety of opportunities in marketing, advertising, public relations and journalism, fashion communications has long been considered one of the industry’s untapped career resources.The Impact of the Internet on Reading and Writing SkillsStudents in this subject area study illustration, packaging, computer graphics, photography, and fashion event planning and production.What are the job responsibilities?● Fashion Stylist● Graphic Designer ● Fashion Journalist● Teacher● Design Assistant● Fashion Assistant● Fashion Marketing Manager● Fashion Editor● Fashion Photographer● Art Director Get more Fashion information Redeem, you can Click here.List of companies employing these professionals:● Pantaloon● Shopper’s Stop● Marks & Spencers● Christian Dior● Lifestyle● Benetton● Liberty● Freelook
Read More
● Total ● ● 985536 Views● 0 CommentsThis is my fashion list with pictures.Although I don’tconsider myself a fashion expertas I lookfor the latest trends in all fashion styles, I am veryknowledgeableabout fashion and whateveryoneloves.Emerging trends in the fashion world have become verypopular, and as 2020 begins, fashion trends are slowly turningintherightdirection. Whether you’re someone who loves vintageandclassicstyles,orsomeonewholikes to beontopof upcoming trends, this piece is for you.No matter how passionate you areabout fashion style, you will always miss the smalldetails, to make it easier for you, I have compiled a list of all fashion styles,perfectforeveryone – small and big.Let’s explore some of these fashion styles one by one.1.Vintage fashion styleVintage clothing is synonymouswithelegance and old-fashionedelegance. These are materials and fashionsfrom a bygone era, but thepastis not really past.Peoplecome and go,fashionscome and go, but the appeal of vintage fashion never seems to gooutofstyle.Vintage is anold-fashionedstyle that never goes out of style. Old is gold, and rightly so, and once you read my recommendations foralittleold-fashionedchic,you’lldefinitelywant to add some to your wardrobe. Jeans,leggings,high boots, skirts are verypopular vintage fashion styles. What doesretrofashionmean? The word “vintage” is often used to describe clothing stylesranging from 20 to 100 years old,which represents the era in which theywereproduced.The necessary condition for anitem of clothing to be classified as vintage is that it mustspecificallyreflect the trends and styles that manypeople often associatewith that particular era. You can find vintage clothing fromhautecouture or high-quality mainstream fashion brands, and they can be new, used, handcrafted, or even crafted.Beyond that, you also need to understand that the definition of vintage can be very flexible, sowitheach new decadesomething new can fall into this category and therefore be labeled as vintage. It is also important for you to know that every item classified as antique becomesantiqueovertime. Any vintage itemof clothing that is at least 100 years old or more falls into the category of antiques. Speakingof kids, we recommend visitingthe Petit Bateau boutique, where you’ll find high-quality vintage and contemporary clothing from France.Hereisanother example of avintagefashionstyle:2. ArtChicStyle ArtChic style is a style trend that caught my eye and attention. It’sgreat to see women who like to dressupandmaketheirown style statement. The idea is to create something unconventional away from traditional styles.This can involve really bold and bright colors, aswellasover-the-top prints. Thesegarmentsoften have unusual silhouettes and oddly unique shapes. Most arehandmade and homemade.Artsy is a style withastrongfocuson creativity. It can be an outfit you can think of and quickly make with fabric you already have.Or you can justweardesignerartwork. Is Artsy Fashion Style right for me?In my personal opinion, I think the artistic fashion style is for those with a high level of creativity. If you like to design and create something new accordingto the lifesituationyoulivein, then this style is for you. I find that manycoolart style enthusiasts prefer unusual clothingand inspired artifacts that enhance the beauty of the style itself.The definition of artistic fashion style is broad and veryflexible, and to find your version of artistic fashion style, you must be bold and creative enough to try different combinations of items and experience the results yourself.Another thing to remember after the COVID-19 outbreak is thatartistic masks have become ahuge part of your style, right?Why do people wear this fashionstyle? Mostly people wear this fashion style so that they cansend a subliminal message to society and make a statement for themselves so that they can stand up for what they believe in. They are usually drawn to items that are handcrafted from highquality materials or at least anything that has unique material value.One of the beautiesof this fashion style is that the beauty of this fashion style will depend on the personal preference of the person wearing it, whichmakes it a fashion style that gives people the mostfreedom.How toweartheartisticstyle?I know two great ways to dress artistically, so let’s see them below.1. Leggings and anasymmetricaltunic The first way is to wear leggings or even skinny jeans with an asymmetrical tunic.Asymmetrical tops offercreativeexpressionwiththeirhighandlowhemlines compared to monotonousplaintops. One of the best ways to style an asymmetrical tunic is with cute black or gray leggings. Peach leggings can also be used in certainsituations, and as I mentioned before, it’s all about your creativity because there’s no right or wrong here. Flatbootsand jewelry add the wow factor to the ensemble.If leggingsaren’tyourthing, try these artistic German socks.2. Dramatic or Creative Jewelry One of the best ways to addanartistictouch to your everyday outfit is towear creative jewelry. Forget diamond necklaces and precious pearl earrings and try unique accessories likeaworkofart that are originally handcrafted from the highest quality materials tolook like an object or toa pure workof art. Be bold and creative andexpress your personality through the clothes you wear. Tip: Addthe Love Moschino ArtPack for a complete artistic look.3. Casual ChicStyleA more formal style,bestlabeledsmartcasual.Casualoutfitsarealwaysidealfor business meetings and office events. Men wear a jacket with trousersandsometimesatie with a formal shirt,whilewomenmayweartrousersandaskirtwithafittedtunicora shirt with a matching jacket. I recommend that you keep enough business records for alloccasions as they will impress onlookers wherever you go.What doeslooseclothingmean? Casual is not a specific set of codes,but the actual definition of casual is anything that hastraditionallybeen considered by many to be inappropriate or inappropriate for a regular occasion that requires a formal dress code. Think of casual wear as a specific set of clothes that you wear to feel relaxed, but at the same time maintaina level of elegance so that you cancomfortably use it as everyday wear. Since you have to choose a specificpieceofclothing and match it with otherpieces, casual wear will oftenmix the look you want with the comfort of theclothes, so getcreativeand try to experimentwithwhatworksbestforyou..Casual dress is one of the best opportunities for those who enjoyexpressingtheir true personal style to the public.Whether it’s your personal preferences that make you want rugged or elegant,understated or luxurious, casual wear invites you to dress ina way that always makes you feel comfortable. Instead of focusing all of your attention onformaloccasions, casual wear lets you strike the balance you want between comfort, personal style, and individuality so you canlookstylish but tired at the same time.FunctionalGear Sample Casual OutfitsSweater with MiniskirtCasual Miniskirt Denim Shorts with CropTopCargo Shorts with PlainWhiteTeeBlack Jeans with 4Military44Shirt, Some Quick TipsBeyond,LetI give you some quick advice. Just in case you’re late for dinner with friends and don’t want to take off your hoodie, don’t worry. Just swapoutthetrack pants for a midi skirt and mules. When the ambient temperature begins to drop, put the leather pants back on. Knowing how to juggle layers is the answer to having the perfect outfit. Throwon your sweater or hoodie and add accessories likenecklaces so you can change your outfit from day to night in a snap.Thisiscalled the power of casual chic style!4.Grunge style clothingThis typeof clothing is a product of grunge music,born in the 80s.The emphasis is on creating oversized and layered silhouettes. This style specifically includes flannel shirts, leather jackets, ripped denim, metallic jackets, crop tops, combat boots, slogan tees, fishnet socks, mom jeans, casualsweaters and hats.Loose,ragged,disheveled clothes are the hallmarks of this style. This style is for everyone, so embraceit in your attire and make an impact on your style statement.Where does the grungefashionstyle come from? The grunge chicstyle was originally inspired by the grunge music scene,whichoriginated in messyand cozy flannel pieces. Originating in Seattle in the mid-1980s,grungeis known for its angsty lyrics and clean sound. Althoughheavily influenced by heavy metal and punk rock, grunge eventually found its own identity by creating its own style and look. Now let’s see how to dress upthe perfect grunge look below.How to dress well in grungestyle?1. Wearing a plussizeblackleatherjacketAfashionistawitha grunge chic style has a black leather jacketasthemajorityofherwardrobe.If you want to dress decently in a rock style, you should keep in mind that black leather jackets are extralarge in size. So, instead of optingforatight-fitting black leather jacket,goone size upfrom your usual size.2. Wear a plainwhitet-shirt This is one of those things you have to have and it’s probably one of the best investments you’ll ever make in your life. A plain white t-shirtcaneasily be paired with your oversized black leather jacket. After that, the next thing you want to do is style your hair tolook messy like when you wokeuprecently,adding a little grunge elementtoit. Finally, you might want to topoffwith a bright red lipstick to add a final rockandroll touch to your overall style.1990s Grunge EditionYou might want to go back to1990s grunge fashion styles for inspiration. Boldlooks that portray this particular erahavebeen made easy, all thanks to the return of this trend,which has becomepopular recently. All you have to do is summon your innerrebel and acceptyourimperfections. Metallic jackets, ripped jeans, contrastingpatternsand baggy cuts are just the tip of the iceberg for this “playful” look.5.Chic ChicStyleIt’s elegance and class without the bright colors. I feellike this style isclean and unclutteredbecause it mostly involves black and white. You can also see other colorsthataren’tasstrong and subtle, but they’re all topnotch and ecstaticallyelegant, with nothing overthetop and no eye-catching colors.What is chicfashion?The word “chic” means elegant and stylish,andgenerally refers to a certain type.Many people usethisterm to give you an idea of the style of a particular fashion or home decor. Some claim the word is sooverused that it simply means something is cool. It mightsoundambiguous,maybeit’s one of those words that we use alot without fully understanding its true meaning. However, in the world of fashion, I can tell you withcertainty that from my point of view, I find that fashion simply means a stylish look produced byasimplecombination of a few elements.Chicfashionistais known for wearing monochromatic pieces with crisp, clean lines that showcase her strength and special taste for fashion.As someone who loves hipster style, you usually choose to wear white, black andneutralcolors, so you can put whatever main color you want on bold accessories, such as crocodileleatherhandbags, or even It’s a classic red lipstick. If there’s one thing you can find in thewardrobe of someone who loveschic,it’smodernshapes,fashionand the latest accessories. ChapterHow Did I Get Chic InAnInstant?1. Try to makeyourclothestastefulinsteadoffocusingonshoes and bagsThis is one of my top strategies forlookinginstantlychic.What I’mgoingto do with my clothes is that I generallychoosethings that areeasytowear and that I feel most comfortable with. One of my favorite combinations of items to use is a skirt with a sexy blouse. Beyond that, I also focus all my attention and energy on the types of accessories I wear, whether I usethem for an occasion or onadailybasis.2. Expose portionsoftheskinappropriately.Parts of the body considered potentiallyexposed are the ankles and shoulders.These are body parts that you might want to expose to bringout the chic featuresinyou.Trywearingoff-the-shouldertopsinstead of low-cutshirts. Instead of a miniskirt, try cropped jeans. You can also gofor a sexier chic version by exposing some of your best bodyfeatures,butitis highly recommended not to expose your legs and cleavage at the same time as you may want to save for a special occasion.6. BohoChicStyleThis hippietrend is alltherage.The style involves women with long hair and bright clothes made of flowingfabrics,including bold patterns and exotic prints,andflared pants. A contemporary takeon this style is bohochic,which uses handmadeclothing from natural materials. This style is known for its flowing and effortlessnature,which you can see in almost everyoutfit of this style. Alongpuffydress is an example of this style.Bohochic is not just a fashion style, it’s more than that. It is a culture that reallyexists, and like any other culture, it has its own rights. Beyond that, it is also a culture that strongly adheresto a particular ideology,with a very unique and complex history. Most people tend to associate the bohochic style with the hippie fashion that emerged in the late 70s and 60s,butbohochicisnow one of the maincomponents of our culture. In fact,bohemian fashion started in the 19th century when it was used as a counter-culturaldevice.Currently, awide variety of bohemian accessories and clothing make bohemian chicatrueculturalphenomenon,a style that incorporateseffortlesselements combined with loose clothing,generalart and comfortable pieces asaculturalphenomenon. jewelry. Most clothes labeled bohemian usually do a goodjob of what bohemian means,a second choice to old-fashioned ways todress while stilloffering the same levelofcomfort at the same price.Bohemian wardrobe essentials Color paletteWhite lace topMixed print tunicEthnic print farmhouse topEmbroidered prairie blouseSkirts4dresslengthsFlare jeansHarem pantsDistressed denim shortsBohemianPrintKimonoDistressedDenimJacketSheepskinCoatChunkyClogsGladiatorSandalsTurbucked4Boots4Boots4Boots4Boots4BootsBagOversizedScarfBrownFringeBag444 Boho Style You toNeedto Know Boho style comesin a variety of cuts and silhouettes, as well as patterns, techniques, and hugedifferencesinthetype of material used. Typically,many bohemian designs incorporate the best all-natural materials togiveyourskin a natural tone. At the same time, the designismainly influenced by theartisticatmosphere, some traditional ethnic and folk elements, andfloralpatterns.Typicalmaterialsoften used for the most popular and iconic patterns and prints include materials such as lace, denim, crochet, leather, suede, turquoise, wood, and rattan. We have some awesome wooden sunglasses in our store that areperfectforbringingout the bohemian look.7. Sexy fashionWhat is sexyfashion? Sexy Fashion Style is about what you can do with your clothes to look as sexy as possible to attract men.This may involve showing as much skin as thelawallows, or itmay not showas much skin but still create that sexyedgetoyouroutfit.It’s about showingoff your best features in the best possible way. If you’re one of those women who loves to showoff what you’ve got, I recommend wearing miniskirts, heels, jumpsuits, crop tops, and low-cut tops that flirtatiouslyrevealthemselves. In the world of sexy fashion, it’s all about showing off some of yourbody’s best features. You need to express yourself in a way that letsyouexpose all the best partsof your body in public to get the most maleattention.Sexy clothing styles are oftenassociated with a pair of high heels, a tight skirt or shorts, which will attractall the eyes of men to you. Sexy styles aimtoexpose your body partsasmuchaspossible and impress others with your beautiful complexion by showing as many parts of your skin as possible.What to weartobesexy?
Read More
The best way to seal acrylic paint to fabric is with heat. The use of heat will ensure that the paint permanently adheres to the material. This will allow the garment to withstand the rigors of constant washing and wearing. Iron is the easiest way to heat. You want to make sure the paint is completely dry before holding the iron close to the pattern.The last thing you need is an iron on acrylic paint! As a general rule, wait at least 24 hours after coloring. This way you can be sure that the paint will stay on your clothes and not transfer to other surfaces.You can also use a dryer on low heat. Whichever method you use, pay attention to the fabric composition of your garment.Some materials react badly to too much heat.Hot irons can cause burns. If you have any doubts about the heat resistance of your clothes, be sure to use a pressure cloth. Also be careful when using the heat from your dryer! They are known to melt certain fabrics, especially those containing synthetic fibers.What is the best fabric paint?Gotideal Acrylic Paint Kit The Gotideal Acrylic Paint Kit contains 18 non-toxic colors ideal for wood, glass and fabric. Rich, fade-resistant hues will appeal to artists and crafters and add sparkle to any project. Ideal for indoor and outdoor use, the paint leaves a glossy, quick-drying finish.ProsQuick dryingNon-toxic, colorfastEasy to mixBulk bottleCons Requires adding fabric backing to paint for use on garmentsLimited color optionsPremium acrylic paint kitThis paint set comes with 6 brushes and is safe for children and adults.A great starter kit for beginners, it contains 24 colors that can be mixed together to create more shades. Works on a variety of surfaces such as wood, plaster, clay and canvas.ProsDoes not contain harmful chemicalsBright and long lasting colorsComes with an assortment of different brushesConsMust use fabric medium for use on clothingComes in a tube not a Pa bottleArt FabeintriczaAvailable Arteza Permanent Fabric Dye is available in 60ml bottles and assorted colours, ideal for use on garments, bags and shoes. This paint is non-toxic and does not tend to crack and peel. Since it’s designed for fabric, you don’t need a fabric backing.It can be used on a variety of materials including leather, denim, linen and canvas. With a quick-drying formula, the paint can be permanently ironed onto fabric.Benefits● 100% Satisfaction Guaranteed● Quick drying● Works on leatherConsNeon colors are more transparent than dark colorsOpaque jacquard finish may require more than one coatTextile Color Fabric Paint This special fabric paint can be applied directly from the bottle. It provides a vibrant color and slightly opaque finish and makes fabrics super soft.works on both natural and synthetic materials, this paint is ideal for your DIY projects.You can even use it on wood and paper.AdvantagesCan be used on leatherCan be applied with brush or padSuper soft finish Designed for fabric, no textile backing requiredDisadvantagesSmall 2.25 oz bottle may not be enough for larger projectsDoes not cover deep tissue● Difficult to find color swatches● What types of fabrics can be permanently dyed?Dust Coating can be applied permanently to any material. However, the quality and longevity of painted areas may depend on the type of material you use.Although designed to be used on any fabric, some fibers provide a better finish. The more natural fibers there are in thefabric, the longer the paint is likely to last. Cotton, silk and wool are ideal for dyeing. Due to the water absorption properties of natural fibers, the dye penetrates the fabric, creating deep, rich colors from the surface of the garment to the inside.Even better, the tighter the weave of the fabric, the better the paint will be absorbed.Thicker cottons (like denim) or stiffer fabrics (like twill) are best for dyeing. Their construction allows more paint to be trapped closer to the surface of the garment before penetrating into the underlying surface.Some synthetic fibers can also be dyed. Some polyester or nylon fabrics will cause the paint to stick to the surface. Unlike natural fibers, dyes are not absorbed by synthetic fibers.It’s on the surface. This means you need to consider the finish of the fabric before you start painting. If the nylon or polyester is treated with a special coating or water repellent, the paint may not adhere to the surface, causing the surface to flake or peel.How to Care for Dyed FabricsTo ensure your dyed clothes stay vibrant, hand wash in warm water and air dry. This will prevent the paint from being damaged by the powerful spin cycle of the washing machine.Hand washing also keeps the water temperature cool. Note that when air drying your garment, keep it out of direct sunlight as the heat from the sun can damage the paint.If you must machine wash your clothes, choose the delicate setting with a cool temperature and little or no spin. Again, air drying is best, but you can also tumble dry on low, as long as time is short.ConclusionPainting on fabric is simple and effective.It’s a great way to create something unique or revamp a favorite shirt. Why not try it? Using the tips and tricks in this article, you can create your own stylish outfits in no time!If you liked this article, let me know in the comments. Have you tried dyeing the fabric permanently?How are you doing? What did you use and did it give you the desired effect? Fabric Painting Designs Stylish Design Ideas You Can Try at HomeWhen you’re full of ideas to make your clothes look great, make a unique statement or just be more stylish. Useful.It brings boring clothes to life. Clothing is your canvas and painting is art with skill. Fabric painting designs are about the patterns you design, the paints you use, your drawing techniques, and the materials you use. Instead of trying to paint on new fabric, you start with the fabric you already have. If you have a plain t-shirt or a plain kurta, decorate it with a picture to bring it to life.Fabric painting is time consuming and requires careful attention to detail. Even if you want to do abstract fabric paintings, it’s best to start with blueprints. Knowing the position will help you align your patterns and designs better. You can start your fabric painting projects with acrylic paints. It is ideal for beginners and is easy to use while producing good results.With your vivid imagination and creativity, you can use art to liven things up and bring clothes to life. Let’s discuss some great fabric painting ideas that provide great techniques for exciting happenings in the world of fashion design.Contents● Basics ● Clothing● PaintingBasics In fabric painting, several important factors must be considered. The choice of paint is one of them. Acrylic paint is a great option for beginners and others.These colors are long lasting and rarely fade after washing. Acrylic paints are available in a variety of colors. Another is the type of fabric to be dyed. Each fabric has different properties, properties and weaving patterns. Fabric paint designs can only be done selectively.● All fashion design courses address these fundamentals as part of the discussion of color techniques. When choosing a dye to dye your clothes, you need to identify 3 types of clothes.● Fiber Reactive Dyes work well on cellulosic fibers including cotton, linen and hemp. Soaking clothes in baking soda before washing can stabilize colors and stains.● Protein fabrics such as wool, silk and alpaca should use acid dyes for protein fibers.● For synthetic fibers ie. Rayon, polyester, nylon and acrylic, everyday dyes can be used with a dye wash. Cotton garments are the best choice for beginners in textile dyeing who want to achieve satisfactory results. Any other type of clothing will require more care and experience to help paint. Acrylic paints work well on cotton fabrics.This will allow for more intricate designs and better color combinations. For best results, dyed fabrics should be clean and wrinkle free. Keep the fabric damp before painting so that the color flows smoothly during application. It must not be soggy or it will absorb all the paint. If the fabric is too wet, the acrylic paint will smear, resulting in an unsatisfactory final look.PaintingPainting on fabric is done by hand or by stamping. You sketch the design, trace it or reproduce it on the fabric with fabric paint pens, fabric paint tubes or paint dots. Before finalizing your design, you can make changes to avoid any changes after you start working on the fabric. It is easier to retouch on paper than to paint on fabric. Choose the paint that best suits the garment.In general, acrylic paints are suitable for different types of materials. The painting methods used can vary from simple watercolor, oil and charcoal stripes. The techniques used in fabric painting vary depending on the design of your pattern and its overall look. Embroidery designs are also available for fabric painting.The painting itself is delicate work.During the stamping process, the pattern cut from the solid base is dipped in color and printed onto the garment. A design cut from a strong base fabric is placed on the garment and brushed or brushed onto the board, allowing the design to be applied to the fabric. After painting, let the paint dry. Ironing the back dyed fabric will permanently set the color of the fabric. TheApparel Design course offers many exercises to help you master designing on fabric.Look for fashion design schools where the art of fabric dyeing is taught in detail. With more practice, you can get better at fabric painting. Once you have mastered this, you can experiment with different painting techniques to further improve your fabric painting skills. Thefabric painting ideas we have shared here are just to get you started. It pays to take formal craftsmanship training so thecan produce impactful designs that define the style for you.W Beautiful Sharee Painting IdeaFrom resist paint to hand paint, there are many ways to give a colorful impression on a saree other than just using paint brushes. The Indian tradition of saree painting can be traced back to traditional painting styles using reverse painting, stamping, pen painting and brush painting. From the pictorial representations that can be found on the walls of temples to the walls of caves, paintings on various materials have been reproduced through the ages and most of them seem to be continuations of traditional arts like Phad paintings, Kalighat, Madhubani, Kalamkari, Orissa Patta Chitra and Warli Art style art.Wearing a hand painted saree is like adding a new dimension to your personality, like a beautiful weave, except the art is created with a brush or a pen. Of course, religion had an overwhelming influence on these paintings.However, it has changed since its more commercial use. However, finding a good hand-dyed saree also means knowing what your wardrobe really needs. While some may prefer the rich, jewel-toned look of Rajasthani Phad paintings, others may prefer the more vivid figures and natural-colored patterns of Kalamkari. Probably few will appreciate the beautiful intricacies that come with Madhubani designs, many will appreciate the abundance of abstract designs and floral patterns that have slowly found their way into saree fashion trends.But there is no doubt that hand dyed sarees as a fashion trend are here to stay.So what’s the best thing you can find in design? For that, you just need to browse the collection, which is mainly divided into three categories – floral, abstract and traditional designs. Each matches a variety of looks and personalities. Floral patterns look best on the lighter shades of sarees and even better on white. The material in the picture below can be plain white cotton, spun silk or silk.The effect of the painting will of course be affected by the choice of material. Although it is safe to say that cotton and silk are the softest on the skin, hand dyed sarees have the best color resolution than those containing lightly synthetic blends. The reason for this is that cotton generally allows colors to run or fade.Green GloryA perfect example of how a single pattern can be created to add so much excitement to an ordinary saree in terms of design is evident in this beautiful crepe.Sublime FlowersA similar floral pattern, but this is the style that draws the most pattern on the front of the saree – ie the part that covers the front down to the shoulders.Note the flowers running along the bottom of the pleats and the pallu with a bit of light pink to accentuate the floral design even more.Vibrant Dual Toned SareeVibrant Dual Toned Saree of purple and fuchsia pairs well with pink and black making it a beautiful color match. Note that the flowers are not always delicate when interpreted and can be done in bold patterns along the pallu like in this saree.Alternating PatternTake any large, linear patterned cotton saree, play with flowers on part of it and voila – simple patterns within patterns!Easy Breezy Well, when it comes to flowers, there is no hard and fast rule to match them too precisely with real flowers, because there is a lot of artistic freedom.Whether it is the shape of the leaves, the petals or their color. Here are two brightly colored sarees with large floral prints, but the way the simple flowers are drawn makes them even more stunning. Note the use of bright colors for the background, rather than the typical light colors.The Contemporary Twist‘s modern take on fabric painting introduces a wonderful blend of rustic ethnic themes with nature-based designs as well as eclectic human figures or spiritual themes. Paintings of Buddha and Krishna on pale paper are all the rage.Lotus PondHere is another look at how pallu is transformed into more traditional wall designs, usually done on Kerala cotton sarees. This pattern is even more magnificent when the white lotus emerges from the pond covered with green leaves.Pink flowersHere one of the most feminine colors is used to adorn the yoke part of the saree with great effect, while the rest remains white with very small polka dots. The same petals, laid on rich silk flowers, look completely different. The fabric really plays a big role in the end result of a hand dyed saree.Ganesha and Shankhapattern murals look incredibly rich, despite being painted on cotton and sometimes silk. The rich definition and details of the figure here, especially the decoration and features, are the most classic part of the appearance.Kalamkari Jewelry Anyone who understands the intricacies of textile art will appreciate the time and skill required to create Kalamkari designs using vegetable dyes. This is a beautiful hand dyed Kalamkari silk saree that brings out the beauty of natural colors.Warli SareeThe art of everyday life has been revealed through this folk art in the simplest stick figure design, loved by all who have seen it, what could be better than giving your saree a whole new ethnic feel Good way to do it with Warli Tribal Art!Two statesWell, not exactly the states of the Chetan Bhagat book, because here are two from neighboring Bihar, you can see examples of them in ivory white silk Madhubani sarees, and another from West Bengal, a black style saree Kalighat. While the Madhubani saree depicts scenes from the Ramayana, in the Kalighat paintings one can see Bengali folk tales and Krishna stories.An Imagery of Abstract DesignsPerhaps the designs that catch your imagination the most are the most artistic and innovative – captivating designs, even when the abstractions seem to fit together in a cohesive pattern. Here are three sarees, each in a different color scheme – some are more intricate, but none can be called boring. Easy Yarn Crafts: Creative Ways to Use Yarn Without Knitting or CrochetingAre you avoiding the yarn section of your craft store because you don’t crochet or knit?Think of all those beautiful colors and soft, fluffy textures you were missing! You can do a lot of crafts with yarn, and you don’t need to know how to work a knitting needle or a hook to make something really beautiful. Invite a friend over and have a fun craft party for adults!Wrap Your Yarn:If it can be wrapped, it can be completely rewound in any color and/or texture your heart desires. Some popular ideas include wrapping garland shapes with yarn in a single shade or in different shades and textures.Styrofoam balls can be made into decorations by wrapping yarn around them, gluing them as you go, and displaying them in glass bowls or large vases. Another option is to use balls of yarn to make garlands! You can also create beautiful monograms by wrapping large letters from craft stores or adding a little flair to recycled bottles, glass vases and hurricanes. Try wrapping the hurricane with just a few strands instead of covering the entire surface. This creates a beautiful glow, allowing light to shine through the glass between the strands.Using recycled bottles and jars, simply cover the center and turn them into beautiful home decorations in minutes.And of course the centuries-old art of raising the Eyes of God!Useful Yarn Craft Tools:● Yarn● Googly Eyes● CRAFT FOAM● SCISSORS● CRAFT GLUE● WOODEN CRAFT Sticks 444 4 4Sleeve display? No picture required, simply wrap a single color of yarn around the entire surface of the frame for a crisp, clean ornament. If you like bright colors, twist them with multicolored yarn or your favorite yarn.Shades are the perfect wrapping canvas; whether the yarn is solid or in multiple shades, the results are stunning. Create an ombre pattern by twisting from the bottom of the shade as you glue. With a particular color theme in mind, start with the darkest shade and work your way up the shade, changing the yarn color about five times until you’re done. For example, a warm ombre design might start with red, move to dark pink, solid pink, light pink, and finally white.Another option is to decorate your table with a napkin ring wrapped in tulle.Picking colors that match the season is a quick way to make a big change with next to nothing. Try wrapping the sides of plain storage boxes or baskets to add color and dimension. It’s perfect for displaying items, catching daily mail, or filling the bathroom with towels or soap. When the holidays roll around, spin the foam cones to make holiday trees. There are a variety of different yarn textures to customize your trees.Try three cones, one wrapped in basic yarn, another wrapped in colorful curly yarn, and a third wrapped in plush yarn for a lovely display.And the jewelry? We’re not talking about children’s wire necklaces; there are all kinds of ways to accessorize your wardrobe. Wrap the yarn around the bracelets for a soft and comfortable look, or use thinner bracelets for a more refined look. Consider adding beads or buttons to your yarn as another way to dress up tired old jewelry. Yarn can also make beautiful ornaments. With the help of a fabric riser and balloons, you can create beautiful ball ornaments that can be displayed in a variety of ways. After dipping the yarn in the stiffener, wrap it several times around the balloon, overlapping it as you go, but don’t completely cover the balloon. When it’s dry, press the ball down and you’ll end up with a nice accent that keeps the ball in shape.Yarn Crafts: Make Your Own PompomsPompoms are a fun way to decorate a variety of items and are easy to make.There are many tutorials that will show you how to do it step by step. There are different ways to make pom poms.You can see how to make these beautiful pom pom chicks here! These adorable chicks are easy to make and don’t require any special tools. Just your fingers, yarn, eyes, and craft foam.Click to see the video tutorial!
Read More
Leaf prints are fun and easy crafts for kids of all ages. It’s also a great idea forbookends or a way to enhance wrappingpaper, cards and other paper crafts.Duration: 10 minutes Level: BeginnerMaterialrequired:-Sheetsof different sizes and shapes.Fevicol WatercolorBrush Step 1: Preparation:-1. Select leaves that are still fresh and soft. Sheets that are alreadydry will not work as theywillcrack and crumble when pressed or applied.Make sure the leaves are dry before usingthem. 2. Select a paper for sheetprinting. Squeeze some paint onto a small dish or palette.Add TipAskaQuestionCommentDownload Step 2: Preparation -II 3. Applypaintto the surface of the leaves. Make sure the entire sheet is covered.4. Carefullyplace the sheet paint side down on the paper.Carefully but firmly press down on the sheet to makesure the wholesheettouches the paper By adding different types of sheets, you can createbeautifulpatterns or designs for wrapping paper, cards, paintings or any other decorativeprojects. paper crafts.6. Add more sheets of different sizes and colors.7. Let the paint dry. Then frame or use your masterpiece for anypurpose. Isn’t it amazing that the word “Art”issandwichedbetween”earth”? Nature is certainly one of thesourcesof our creative projects, and ifitturnsouttobe something we can wear,that’sabonus. We love clothes made with leaf prints on fabric, it inspiresideasfor more artprojects.Ihave been interestedinfoil printing on fabric ever since I read Lotta Jansdotter’s printing book a few years ago.It’sasimple project that brings nature and art together in such a beautiful way -it’s hard to take your eyes off the beautiful result.Fortunately, you can wear them.For our first project, Maia and I used a thick cotton fabric about half a meter long.The original idea was to involve Maia in making some of her own clothes and I told her thatIwould sew her a dress or a skirt from the fabric we hadembellished.Anotherday we tried printing leaves on t-shirts. There are many options, but everysheetprinting project involves the same process.Here’s how we made the leaf print,followedby the skirt and blouse.Leaf prints on fabricMaterials FabricFabric paintMini paint roller or hardware store paintscraperHard rubber clothAcrylic frame (or board)44sheetsofpaper or scrap paper,Petals and ferns any shape and size Instructions Step 1: We applythe fabric paint totheframeofthe acrylic box (but you can also use a plate) and roll our mini paint roller overit (ours is from the hardware store)several times.Afterhavingsoaked it intextile paint, it iswrappedaround a sheet. You can do this on newspaper or scrap paper to protect your work surface.Step 2: We then place the sheetpaintside down on our fabric, place a piece of newspaper over the sheet and rollit over the sheetseveral times with a hard rubber roller.Step 3: Ofcourse,the best partisturning the pages to see the print. Gently lift the paper, then the sheets.Some resultsare better than others, but for the most part they lookgood.WearableArt:dresses,shirtsandpossibilities!1) MAIA’S NEW DRESSI used our first large leaf print fabric andsewed a dress for Maia with a cinched waist and a brown ribbon along the bottom edge. I used fabric scraps to create a matching leaf print appliqué to cover a stain on one of Maia’s t-shirts.2)LeavesandFernsPrintT-Shirt Next, the momsfrom our toddler art group got together to try this technique.We love our toddler art group,whichorganizesweeklyactivitiessuchasfingerpainting for thekids. But we also found it necessary to gettogether for MomsArtNight, including wine, chocolate and talk time. So we gottogetherin my friend Meg’s studio andexperimented with printing on differentmaterials with leaves and ferns. I made fern print t-shirts for me,Maia and Daphne.3) Morepossibilities!I have also made leaf prints on muslin to turn them into napkins by sewing them onto a fabric backing. At the time, any free sewing time wastakenup by Maia’s birthday (making rainbow streamers and dress-up gamefabric), so we had to wait a bit longer. But it was encouraging to know that the fabric was ready. I love the detail in these leaf prints, especially the fabric paintswhichcomeinmultiplecolors. Leaves are so beautiful and printing leavesonto fabric is now one of my favorite art activities. You can create a varietyofoptions- table runners, doll blankets,pillowsand even curtains. Printingsheets on paper opens up another field of possibilities!How are you? Have you tried printing sheets on fabric or paper? Flowershittingthe fabric Springishereand flowers are everywhere!We were looking for a way to preserve thebeautyof this springand create a beautiful piece of home decor, and wefound the perfect craft! We call it Flower Pounding and it involves hammering flowers onto canvas or fabric to create works of art. Just grab a hammer and a handful of your favorite gardenflowers and getstarted! The color of the flowers bleedsinto the fabric or canvas, which ends up looking almost like a painting. You’ll definitely have to hit the flower harder than you think, so we recommend taking this project outside andhittingit on the sidewalk instead of the kitchen table.It’s also a great way to preserve your bridal bouquet instead of drying itout and retainingbulkypieces. Scroll down for the tutorial!Youwillneed:CardboardWatercolor paper ORClothHammerORHammerFlowers (the finer the better)ParchmentEmbroidery4Embroideryneedles44f44Embroideryneedles44f44Putpencils watercolorHow to makeabouquetatKeepWhatYouLoveAgreat fun craft for slightlyolderschoolchildren who haveaccessto a hammer. Tryingtoidentify your flowers first to make it educational? Arts and crafts and botany in one?
Read More
Another royal type of Indian surface craft – Zardozi, where “zar” means gold and “dozi” means embroidery. Made from gold and silver threads (zari), they are sometimes decorated with studs of pearls and precious stones, giving them a royal look. According to Strands of Silk, it originated in Persia and came to the Indian city of Lucknow via the Mughal Emperor Akbar, who used it for clothing and interior decoration. Ancient Indian texts such as the Ramayana and Mahabharata also mention zardozi craftsmanship used in the king’s garments of pure gold. Many creators like Manish Malhotra, Sabyasachi, Suneet Varma, Tarun Tahiliani, Shyamal and Bhumika etc.These types of Indian surface works are often used in their collections. Patterns include peacocks, flowers, leaves and more. Today, it is mainly used in wedding dresses, fashion collections, dresses, clutches, mojris, etc. Heavy, beautiful and durable!9.Kundan Work Kundan is a rich and intricate Indian surface work where sequins of drops or leaves are glued onto the fabric surrounded by gold and silver (zari) threads. It was introduced during the Mughal era around the 19th century in the regions of Rajasthan and Gujarat and was mainly used in heavy bridal sarees, sheaths and accessories.There is a huge market not only for fabrics bu t also for kundan decorative accessories mainly using gold and meenakari artwork for special occasions. The pattern is similar to zardozi, which gives the fabric a 3D look. It is also seen in bridal attire in South Indian weddings.Personally, I love this look, mainly this Indian blouse paired with a Kanjeevaram silk saree. Due to the weight of all the sequins, kundan made sarees and lehengas tend to be heavy and lined with another fabric such as satin to support it.10. Kasuti handicraft InKasuti, “kai” means hand, and “suti” means cotton, which means handicraft made of cotton woven on cloth. According to Direct Create, the traditional folk embroidery of the Dharwad region in western Karnataka originated during the Chalukya period in the 15th century.Ilkal sarees, Dharwad sarees, Chandrakali black silk sarees, Ravike or blouses, Angi or kurtas are famous products of this embroidery.From the smallest to the most intricate pattern, masterfully finished in 64 art forms in vibrant colors and contrasting cotton yarns. It is a combination of four embroidery stitches – Negi, Gavanthi, Murgi and Menthi which can be done individually or in combination. Designs based on rangoli designs are common, such as sunflowers, chariots, conchs, shivlinga, doves, swastikas, and elephants. I would love to wear these very light sarees while giving an elegant look!11. PhulkariNext is Phulkari, where ‘Phul’ means flower and ‘Kari’ means work of art. It is traditionally practiced by women in the Punjab region. We hear of the famous Punjabi love story of Heer-Ranjha, which mentions the first record of this craft in the 18th century. Phulkari is used for daily and occasional use in the form of dupattas, handbags, patiala suits, etc.Designers such as Manish Malhotra and Kanika Goyal have used this artwork in their special fashion week collections.Hand-spun embroidery comes in many colorful forms such as multicolored phulkari such as Satranga (seven colors) and Panchranga (five colors); Leheria (sea waves); Dhoop Chawn which literally means sun and shade (a combination of white and golden yellow); and a lot of. The embroidery gives it a rich mosaic effect, with unique untwisted silk threads in bright colors, geometric or floral patterns. 12. Kashida embroideryKashida embroidery is made with thick threads and colored beads to create different natural patterns, usually paisley patterns.Designed for men, it originated in Kashmir and was traditionally worn by Mughal emperors. Mainly used for dau shalos, pashmina shawls, jackets, saris, upholstery etc.According to an article published by Vogue magazine, Tarun Tahiliani talks about her new wedding dress collection, which includes Kashida embroideries. He mentions: “Kashida has been a big part of my growing up story and constantly surprises me, but he has all the qualities I love to talk about. He’s malleable, he’s got color, he’s lightweight, he’s versatile. Kashida or Kashidakari sews the beautiful essence of Kashmir with bright colors. There are other types of Indian surface craftsmanship in Kashmir, such as Sozni craftsmanship, a very fine and intricate needlework; Aari or Crewel embroidery, which is done using flower-inspired crochet hooks. patterns and built around the fabric with chain stitches. The patterns used are mainly natural elements such as cypress leaves, vines, animals, flowers, vines, lotuses, mangoes, almonds, etc.13. Chamba Rumal Rumal in Literally means handkerchief in Hindi.Chamba rumal is an embroidered handkerchief craft originating from Chamba in Himachal Pradesh. According to The Better India, the rulers of the Chamba kingdom kept embroidery in the 18th and 19th centuries. Embroidered dresses are often given to girls at their weddings and are common in the hills and valleys of Himachal Pradesh. This beautiful embroidery uses simple natural designs such as trees, flowers, fruits and more. In bright colors.It also contains intricate designs such as mythological, Raas-Leela scenes such as hunting and wedding scenes. Both men and women use these rumals and shawls. Can you imagine their embroidery so perfectly done that the fabric is the same on both sides? For example, they kept embroidered Rumals as heirlooms for future generations and used them in ceremonies.Indian Culture Preserved Through HandicraftsVarious Indian surface works are popular not only in Indian market but also in international market.Craftsmanship has gained interest over time. Embroidery is also back in fashion, with contemporary styles ranging from bridal to casual, party to formal. Top designers like Anita Dongre, Tarun Tahiliani, Sabyasachi and many more. Also brings an Indian essence to a modern silhouette.This type of Indian surface work is one of the beautiful gifts that the rich Indian culture has to offer. However, these traditional handicrafts also tell the story of India, from the picturesque valleys of Kashmir to the opulent royal attire of the Mughals in Delhi and the nawabs of Lucknow.
Read More
Rows of beautiful stitches. You can change the stitch length to suit different fabrics or decorative looks. These will be the most common stitch types used on a sewing machine. Use it to finish seams, hems, topstitching and even edges.Here are some straight stitches of different lengths. For most projects with light to medium cotton fabrics, test on a 2.5 inch length of fabric first. See how it looks and adjust it accordingly. As with all sewing machine stitches, be sure to check your sewing machine’s tension. This means the seam should be nice and even, and not curl around the back and front of the fabric.Further Reading: HOW TO USE YOURSEWING MACHINE ZIGZAG STITCH Zigzag stitches vary from side to side in width and length. It can be used for seam facings, applications and elastic seams. If you are sewing bodysuits or swimsuits, zigzags are essential for sewing leg and neck elastic.Further Reading: Zigzag StitchOVERSTICK Theoverlock or overlock is primarily used to finish seams. Unlike serge, it does not cut the raw edges of the fabric.For this reason, it is important that your edges are pre-cut nice and clean. Most machines come with a special presser foot to handle this stitch, which prevents the edge from rolling and provides guidance for your fabric. Further Reading: Overlock StitchButtonhole StitchThe buttonhole stitch is very similar to the zigzag stitch, but many modern machines offer it special features. It is a very narrow point with almost no space.Read more: How to sew buttonholesBlind stitch Blind stitchis used for wide invisible edges on skirts and trousers.It uses a variable width zigzag stitch and is the default on most machines.Further Reading: How to Sew Blind Stitches Decorative StitchesThese are not for everyday sewing, but for decorating your sewing projects. They’re kinda fun and can customize everything you do. The number of decorative stitches varies greatly between machines and brands.In general, the more expensive the machine, the more decorative stitches you will have to choose from.Don’t feel bad if you have almost nothing on your machine. I only have about 8 hosts and only use them once. Probably le Types of Hand SewingIf you’re new to hand sewing, you might want to read some of these articles to get started.Oidery BasicsToolsHow to Thread a Needle● Hand Sewing Needles● Embroidery Tools● How to Embroider● Hand Sewing● Embroidery 4 ST444 Let stand first. The list is in alphabetical order as this is the most used of all hand stitching.It’s fast, super easy and even a beginner can sew. Row stitchis a simple top and bottom stitch that can be used for decorative embroidery and simple stitching. The stitches can be large or small, but the closer together the stitches, the stronger the seam. If you’re embroidering with running stitches, keep in mind that longer stitches can snag.Running stitches remain fairly uniform for the most part, but interesting effects can be achieved by varying stitch and gap lengths.Full story: Running stitch Running stitchBACKSTITCHbackstitch is another widely used stitch for sewing or embroidery. For seams, this creates a stronger stitch than the back stitch that is less likely to tear. Although it takes a little longer, it’s not that difficult. For embroidery, it can be used to create embroidered letters or to draw shapes that will be filled in with other stitches.Full Text: How to Sew the ReverseStitch Types– Back StitchBlanket Stitch Blanket Stitchcan be used around the edge of a blanket (no surprise!) and sew the fabric or felt together. It creates beautiful embroidered flowers and is a popular appliqué stitch.Complete story: how to do blanket stitch (video included) Types of stitches – blanket stitchButtonhole stitchAlthough similar to blanket stitch, it has a rope edge and is suitable for buttonholes and decorative flower stitches . It is sewn from right to left, which is the reverse of the blanket seam.Full Text: How to Do a Buttonhole Stitch Buttonhole StitchButtonhole stitch is used to sew hems by hand, especially for heavier materials such as wool.The inside hem looks like a series of small cross stitches, while the outside has barely visible seams.Further Reading: Hanging StitchHanging StitchChain StitchChain Stitchis a useful fringe stitch because it creates a thicker border. Use it for the outside of letters and shapes, including flowers and stems.Full Story: How to Chain StitchHerringbone StitchHerringbone Stitchis an excellent type of stitch for cutting and filling large areas. It works left to right along straight lines that can be split or joined.Full story: How to do it Herringbone stitch Herringbone stitchLAYER STITCHLayering stitch is a method of sewing on thicker yarns or even yards to create endless shapes and lines. To create this stitch, lay a thicker thread over the surface of the fabric in the desired pattern, then sew over it with a thinner thread.Full Text: How to Couch CouchingCross StitchCross stitch is a popular hobby where entire designs can be created with this simple stitch. The stitches range from very small to large and are usually made on open weave fabrics where you count the threads to even them out.Full Text: How to Cross Stitch (Including Single and Double Cross Stitch) Cross StitchFAGGOTINGFagoting is one of the types of stitches used to join two pieces of fabric.It can be used as an open edge for towels, underwear and tablecloths. The cut is often so detailed that it looks like lace has been inserted between the fabric.Full Text: How to Do Fagoting FagotingFeather Needle Feather Needleis a flowing stitch for small stems and corals. It is sewn between 4 parallel threads and is best suited for intermediate embroidery.Full text: How to do the feather needle The feather needleThe fern needle The fern needleis another stitch similar to the feather needle and is used on stems and leaves.Easier to do even without drawing guides. It can be straight or slightly curved, which makes it ideal for stitching up gardens.Full Text: How to Do Fern Stitch Fern StitchFish StitchHerringbone Stitch is not usually used to make fish stitch, but is used to make stuffed leaves with a criss-cross effect interesting in the middle. The ends of the leaves can be pointed or rounded, making them very versatile when sewing leaves.Full Text: How to Do a Herringbone Stitch Herringbone StitchFlying Stitch Flying Stitchcan be used alone to sew fun little herringbones or joined together to embroider leaves.This is an easy stitch for beginners.Full Text: How to Fly Needle Fly NeedleFrench Knot TheFrench Knot involves wrapping yarn around a needle before inserting it into the fabric. These buttons can be used to create small flowers like fireworks, lavender, and are perfect as centerpieces for flowers sewn with other stitches. They may be small, but French knots are very useful. The size of the French knot can vary depending on the number of times the yarn is wrapped around the needle.Full Story: How to Tie the French Knot French KnotBlank StitchHerringbone stitch is primarily used to fill in the edges of the stitch. It works from right to left between 2 parallel lines with relative ease.Full Text: How to Do a Herringbone Stitch Herringbone StitchBlindstitch (Leather Stitch)Blindstitch, also known as leatherstitch or slipstitch, is used to close open seams on toys , beanbags and clothes . It is sewn into the folds of the open seam in a zigzag pattern before being closed. As the name suggests, it creates an invisible closure when sewn with matching color thread.Further Reading: Blindstitch
Read More
Sewing – what is it? and how it attaches to your garmentA seam is a term that refers to the seam (seam, if you need the technical term) that holds two pieces of fabric together. It is the cornerstone of a garment. The seam along the seam is called the seam line.The seams ensure the structure of the garment and contribute to its construction.They are also used as decorative elements.Seam Allowance (SA) is the space between the edge of the fabric and the seam line. You can see the article on seam allowances for more details on how to sew straight lines and common seam allowances to use.● How to choose the right stitch for your sewing.● 1.Lockstitch● 2. Single-needle lockstitch● 3. Double basting lockstitch● 4. Bartack● 5. Hairline● 6.Butted seams(also known as stamped seams)7. French seams8. Flat-cut seams or top and bottom seams9. Spot flat seams (also known as welt seams)● 10. Rope joint or of pipe● 11 .Front seam● 12. Fall seam of hem● 13. Artificial seam (1)● 14. Artificial seam (3)● 15. Serrated seam● 16. Split Size 17.Toe Size 18.Bounate Size 19.Sheet/Linen Size 20. Hand Sewn –Leather Stitching 21.Belt Seams● 22. Sealed SeamsHow to determine which seams are best for you.A beautiful dress must be sewn with care. Not only that, but it should match the type of clothing you have, the material it’s made of, etc. Example: Flat seams are used to make the side seams of jeans.There are a few things to consider when deciding which seams to use.Substance type – “What substance is this?” is the primary consideration. If it is a transparent material, the seam treatment you choose will be very different from that of a thick damask material. Loosely woven cotton seams have a different finish than rayon blend fabric seams.Lace fabrics have different seams than denim fabrics. Here is an article detailing all types of materials.Seam Placement – Curved seams are treated differently than straight seams. If it’s an exposed seam, like a trouser, it’s different from a closed seam, like in the yoke or the collar. Sewing machine– What can your sewing machine do?What accessories do you have? , also important – if you have a sawtooth machine or at least a zigzag sewing machine, you have a lot more possibilities than just a straight line sewing machine.Use and Use of Clothing—Children’s dresses require tighter seams than camisoles. A wedding dress has seams treated differently than a biker outfit.related posts: How to sew a straight seam with simple tools.Sewing Type1. LockstitchIn a lockstitch, two pieces of fabric are joined together with thread along the seam line. It is also known as the single-needle butterfly stitch because once it is sewn, the seam allowances on either side of the seam are pushed back to resemble a butterfly. This is the simplest and easiest seam to make. It can be done by hand or by machine.A straight stitch is used to make this type of seam, but a tight zigzag stitch can sometimes be used to make this type of seam, especially with knitted or stretch fabrics. Learn more about straight and zigzag stitches.Exposed edges of this seam require seam treatment. The advantage of theflat seam is that this seam does not add bulk to the seam line. But since it only has one seam, the seam strength is not very great.Unlike the regular presser feet you use for sewing, you can use the 1/4″ presser foot for precise sewing with 1/4″ or 3/8″ seam allowances. It helps you to achieve a continuous line of stitching with the same seam allowance. See this article on using a 1/4″ sewing foot for details.How to Sew a Lockstitch Bring the right sides of two pieces of fabric together. Make sure the sutures are aligned.Sew along the lines you made and mark the seam line.Start sewing, then backstitch for added strength. Finally, do a reverse stitch, then do a forward stitch.Don’t forget to open the seams (do not iron; just press with a hot iron) For more on regular seams, click here to sew them strong and straight, not loose {& pretty seam curves} The best way to hand sew flat seams is to use a backstitch or saddle stitch. Saddleback stitches resemble machine lockstitch stitches.You can check out these Saddle Stitch and Back Stitch articles for detailed steps on how to do it.2. Single-needle lockstitch Simple overlock, this stitch is both a strong stitch and a decorative stitch.How to Sew Flat Seams in Simple Cross StitchTo achieve this effect, push both seam allowances to one side and topstitch on that side.3. Double topstitch Flat seamDouble topstitch, it is a decorative seam which also gives great resistance to the seam line.How to secure a flat seam with a double topstitchTo achieve this seam, after the flat seam is complete, press the seam allowance on both sides and topstitch equally on both sides of the seam.4. Reinforced seams In many cases, you want the seams to be super strong – and there are plenty of ways to achieve those tear-resistant seams. Check out this article on sewing super strong seams here.5. Hairline Seam This is a closed seam, mainly used for collars and other closed areas. The seam hem is closed and cannot be seen from the outside.How to sew a hair seamMake a flat seam using very tight straight stitches that hold the straight sides of the fabric together. Cut very close to the suture line.You can also cut the excess seam on the seam and crimp the seam. Make sure the sutures are not cut when cutting.Turn right.You can topstitch to secure the seam6. Splice seam(also known as stitched seam)This is a very useful seam when sewing heavy materials such as suede, leather artificial, felt, etc.How to Sew a Patched SeamDecide which piece of fabric will have a patch application on top. Turn under the seam allowance of the patch along the seam line and press in place.Place the folded fabric on top of another fabric along the seam line. The seam lines should line up. Snap together to hold it in place.Sewn edge close to folded edgeprint.When sewing with heavy fabrics that do not fray at the edges, you can create this seam by trimming all of the seam allowance from the top piece. Now, since there is no more fabric to turn over, most of it is sold out. 7.French seamThis is the best seam for transparent fabrics.Since this seam wraps the raw edge in a pleat, the raw edge is invisible from the outside without adding bulk. This seam is usually done on straight edges, but it can also be done on curved edges if you cut carefully.How to Sew a French SeamFor this seam, unlike other seams, you must start on the wrong side of the fabric and match together at the seam line (not just together) to form an even seam. Thebegins by marking the seam on the right side of the fabric with a 1/2″ seam allowance. Then draw a line down the middle of the original flap i on the wrong side.e For a 1/2″ seam allowance, mark a seam1/4″ across this 1/4″ line for a flat seam. (picture 1 above)Slightly trim the seam allowance.Now fold the right sides of the fabric together at the seam, covering the raw edges.Theis sewn over the original seam.(at 1/2″ mark) right sides together on fabric (picture 2 above)Flatten and iron to one side.Raw edge is now securely closed in the back. To make French seams And for a more detailed description of its use in garments, please refer to back French seam.This gives sufficient strength to the seam line. This seam can be sewn both inside and outside the garment.How to sew a flat seam?Makes flat seams. Iron the two seam allowances on one side.A seam allowance is trimmed to 1/8”.Flips the larger seam allowance over the smaller seam allowance, almost to the previously sewn seam line. Press it with an iron.Now fold over the entire seam on the other side so that the original edge is hidden and ironed.Hem seam.Be sure to keep an even distance from the original seam line.Learn more about flat seams here.9. Simulated flat seam (also called welt seam)This is a seam that looks a lot like a flat seam, but is easier to sew.Unlike the flat seam here, it is unturned and unturned.So this seam will have a raw seam on the wrong side. Therefore, it is better to use materials that do not fray or have invisible seams. This is an excellent seam for bulky materials like felt or synthetic leather.How to sew a simulated flat seam.Sew flat seam as usual, with straight sides sewn together. Decide on which side to sew the seam allowance. Trim the seam allowance on this side to half its original size. Push the seam allowance on this side. (the larger seam allowance will now exceed the smaller seam allowance)Now go to the right side of the fabric. Border close to the seam.Then go to the other side and sew along the raw edge. There will now be two rows of stitches parallel to the seam line.10. Cord or piping seamIn this seam, a fabric-covered cord is inserted between the seam lines. It is a decorative seam, mainly used in collars, cuffs, bags and interior decoration fabrics.How to sew a cord or tube seamThis uses a cord covered with a stapler. You can buy prepackaged power cords or buy power cords and pack them yourself. It is sewn with a zipper at the foot. Secure the rope firmly in the side strips, then sew the side strips with the zipper foot and sew the rope inside. The suture should be placed as close to the cord as possible without the needle touching the cord.See tutorial on how to make bias tape and how to tie fabric edges withbias tape 11. SeamsSeams are typically used at armhole, neckline and waist seams. This creates a very nice finish at theseam line How to RepairFace Seams Make a finish for the seam Sew it at theseam line Trim the seam allowance to half its width.Press the seam allowance to the sideTrim the seam allowance to the side close to the seamThis underseam prevents the seam from rolling up on the outside of the garmentConsult the tutorial for the best way to make a cover.12. Overcast Hanging SeamHow to Sew Overcast Hanging SeamMakes a flat seam. One seam edge is cut halfway the other. The other seam is folded down and tied by hand.13. Simulated French Seam (1)This is a seam that can be used in place of a French seam where a French seam might not be possible, such as in curved seam lines, for ex.Armholes of a transparent dress. This will also cut the seam lines cleanly. How to sew ridiculous French seams.Unlike French seams, here the straight sides are sewn together first for an even seam.Places materials directly on top of each other.Sew a flat seam along the seam.Press the seam to open it and then close it.Turns hem edge 1/4 inch for each seam. pressure.Sew the edges along this folded edge so that the raw edge is closed on the inside.14. Mock French Seam (3) This is another copy of French Seam – looks similar but does it differently.This seam can also be used instead of French seam and is ideal for sewing thin, delicate fabrics and loosely woven fabrics that tend to fray.To secure this seam, sew a flat seam as usual. After that, halve one of the seam allowances. Flip the other seam allowance over the finished seam allowance and stitch in place. Use a small zigzag stitch for this.Your new seam will be just outside the seam line. 15. Zigzag seamFor this seam you will need a serger or serger.In this seam, instead of regular straight stitches, zigzag stitches are used at the seam and the seam allowance is machine cut. This seam gives elasticity and flexibility to the seam.This seam can be used with1. It doesn’t matter if the seam stays flat or flares out.2.For loose garments3. On lightweight fabrics4. When sewing knitsHow to sew a signature seamGather the right sides of the fabric and match the stitch lines.Tighten the fabric under the needle Thehemming machine automatically trims the seam allowance and wraps the edge of the fabric with thread.3-thread cut seams will give elasticity to the seams and 4-thread cut seams will give the seams strength.3-thread cut seams are often used on knitted fabrics because of their stretch.16.Lock SeamThis seam, which resembles a patch seam, is used for its functional and decorative properties.How to sew a seamTake a piece of fabric 1 1/2 inches wide, the length of the seam, under the seam. It is used as a backing between two fabrics which are patched along the seam.17. Counterseamis ideal for sewing heavy fabrics where both raw edges are bound with two seam allowances along the seam lineQuantity is bound to wrong side PrintPlace wrong side of first piece of fabric along the edge on the right side of the second piece of fabric, keeping the seam allowance. Hold thestitches in place along the folded edge.18. Butt seamThe edges of the fabric are folded over and joined with a zigzag stitch or a chain stitch. This is used when joining seams that do not require bulk. For example when sewing underwear. You can make this seam using a19 sewing machine. Sheet Seam/Linen Seam This is a seam where we use embroidery stitches to join the seams.It’s very nice, but not as strong as the other seams. Stitches can be set horizontally or diagonally. Antwerp edge seams, herringbone seams, blanket seams or herringbone seams can all be used to join seams in this manner. These points are called insertion points. How to sew this seam1.Finishing the edge of fabric2. Tape the edges of both ends of fabric together with buttonhole stitch3. Cut a strip 1 inch wide and the length of the edge of fabric4. Drape the edge of fabric over the paper from the edge of the fabric, Make a distance between them of 1/2 inch5. Sew the stitches between the edges of the fabric, weave, knot, turn all the work between the sides For more details see the post – Insert Stitch6 .
Read More
1. Sewtheskirt. Since every style of clothing is slightly different, there are afew key points for everyone to keepinmind when decidingwhich clothes to make and how to make them.[2]Youcanchoosefrommany types of skirts:A-line skirts, roundskirts, flared skirts, gathered skirts, maxi and mini skirts, pencil skirts, pleated skirts and manymore.Youhave to decide which dress to try on.[3]The most basic skirt you can make is a tube skirt, which requires elastic and fabric (elasticity is good). You can make them in about an hour, and they’re fun, comfortable, and easy to wear.[4]Generalsewingsequenceof a skirt:sideseam,front and back seam, zipper or methodofclosure, waistband, hem. 2.Choose a flattering typeofpants.Since pants are so versatile and can be made fromalmost any material, they make a great project once you’ve mastered the basics. You can make iteasier by making pantswith an elastic waistband, or you canmakeit more complicated with zippers,buttons, and abelt.The general sewingsequencefor jeans (or other trousers) is: pocket,sideseam,front and back seam, zipper or closure, waistband, hem.3. Fashion.Likewise, there are tons of different types of dresses to create, from softcotton summer skirts to long flowing ballgowns. Dresses can be more complexthanskirtsetc, so bestnot to make one until youhave the basics.The general sewingsequenceof a dress isasfollows:inseam,shoulderform, side seam, top of skirt(excepthem), bottom of skirt,back and front seam. Then you addthebottomof the skirt to the top of the dress bodice at the waist, attach the zipper or buttonholeand hem.4. Sewn shirts. Although fun to do,it can get a littletrickyasyouhave to make buttons and sew curves (since yousew along the lines formed by the neck and shoulders). You also have to deal withmoreboilerplate.The simplest type of top is a pullover knit top without buttons or pockets.The general sewingsequencefor a shirt (or jacket) isasfollows:bottomseam,shouldershape,zipper or buttonhole, shoulder seam, side seam,neckline and front,armholes, sleeves, hem.5.Selectthe jacket style. Jackets and coats are one of t he most complicated sewing projects. You’ll want to wait making them until you’ve gainedplenty of experience,as they include buttons and pockets, runinoutlines rather than straight lines, and are made from alot of mats.Thesimplesttypeof jacket is one that hasno lining or sleeves that don’trequiresewing.Stitch FormationIn this technical bulletin we will look at the application of sewingthread,inparticular the stitch.StitchFormationDeviceThe fundamental principle of all machine sewing is consistent stitch formation. Whilesewing, the needle descends through the fabric to the bottom of its stroke,creating a loop of sewing thread in the scarf of the needleasitgoesup. This loop of sewing thread is gripped by one of two stitch forming devices,a hook or a looper. A third typeofstitch-forming device iscalled a spreader and is used withcertain types ofstitches to transfer sewing thread from one stitch-forming device to another. The sewing machine hook,whetheritisarotary hook or aswinghook,locks the upper thread with the lower thread. A looper used in chainstitchformationswraps the thread heiswearing with another thread.Stitch Formation StepsThehas five basic steps forformingalltypes of stitches. They are:1. Pierce – Needlegoingthrough fabric with thread2. Loop formation -When the needle begins to comeup from the bottom of its stroke,thesewingthreadloopformsintheneedlescarf3. Structure- this is where the threadlinesupon,under or around sewing material4. Downconnection-this is where the needle loop is released from the lower stitch forming device5. Stitch adjustment- when the thread is pulledup or infabricStitch type101 – Single thread chainstitch are formed byintroducingasingle sewing thread duringsewing. Stitch type 101 is mainly used for temporary [or basting]stitches.Its biggestflaw is its tendency to run backwards from the end of the seam. 103 – Single Thread BlindStitch A derivative of the101 stitch type is the103 stitch type, known as single thread blindstitch or blindstitch.Again, its biggestdrawback is theshrinkageoftheseams. This stitch is created using a curved needle thatusestheneedlethreadtoenter and exit the fabric on the same side. The needle thread islocked on the surface of the fabricwithablindlooper. Typical applications are hem and cufffilling operations.301 – LockstitchThe most common typeof stitch is undoubtedly the single needle lockstitch301. Its main advantage is that it looks the same from top to bottom [and is reversible]. It canproduce tight, strong, low-volumeseams, but its main disadvantages are low elongation and low productivity due to the need forfrequentbobbin thread changes.401 – ChainstitchHigher productivity and greater sewingextension can be achieved withthesingle-needlechainstitch401.The downsideto using this typeof stitch is that it isnot reversible and since it is achainstitchittends to loop and producestitchesthatarelargerthan the lockingpoints.Itcanindeed be argued that the 401 chainstitch has morestretch than the 301 lockstitch and produces lower seam pull when the cause of the pull is structural stress. Multi-needleLockstitch and Chainstitch301 Lockstitch and 401 Chainstitch machines canbothbeused to produce multi-rowstitches. The most common is twin needle, but multi-needle chainstitch machines are also readily available.Double needlebartack Double needlechainstitch Zigzagstitch – Stitch types 304 and 404If higher seam extensionisrequired with bartack or chainstitch,zigzagstitchescanbe used.For example, in corsetwork. To createazigzagpattern, the needle bar moves sidewayswhilefeeding the material. The main drawback is that the zigzag stitch may not produce the desired look.Zigzag stitch 304 stitch406 – Bridgestitch401Aderivative of the chainstitchis the constructionofbridgestitchesinchainstitch. The most common of these is the 406 double needle blanket.This typeof stitch is formed with two needle threads and one loopthread, and its main useisforsewingknit garments and elastic/lace appliqués on undergarments and undergarments. Stitch TypeOverlock 407 is the three needle version of this stitch type. Therearefour-pinversions, but theyare not commonlyused.503 -DoubleThreadEarring(Tied) Earring stitch constructions are all includedin the 500 classification. 503 DoubleThreadOverlock is a stitch used for single layercutting and lt-shirthem.This is sometimes calledwelt.Stitch Type 503is not suitable for sewing operations as it is designed to sag and flatten when the seam is sideloaded. 504 – Earwiththreethreads This typeof stitch is madeupof three threads, it has a needle thread and two loop threads. The504stitch type has excellent elongation and does not unravel easily. It is often used for hemming to preventfrayingofthe fabric and tojoin 2 or more layers together.These machines are abletowork at higher speeds, which helpsincrease productivity. Four-ThreadOverlockFor overlock seams requiring greater seam security,usethefour-thread version of the 504 stylestitch. There are three-lineandfour-linehem stitch types. Stitch type 512The 512 stitch is calledafauxfour-thread safety stitch because the top of the stitch type resembles the top of thetype516stitch,whichisatrueovercastsafetystitch.The512 stitch type is also known as afour-thread,half-wrapear. Stitch 514 The second typeofear stitch is the514stitchtype. This is calledafour-threadhem, full hem. This is because the upper looper extends its thread to the left seam,while stitch type 512 only extends its upper looper thread to the right seam
Read More
No need to scroll through long slideshows and how- to videos to improve your sewing skills. In this tutorial,we’ll cover the basicsof draping youneedtoknow, the first in a series. Grab your dummy,tape and muslin-let’s get started!Prepareyourworkspace Buythe tools we used: Lance 24″ French Curve (for next steps)Blue Dritz Mark-B-Gone Muslin (choose the closest fabric you willuse))FaceTape(tomark the outline, fabric will follow)Drapetape White Mood tapemeasureElongatedballpin 8-inchtulapinkscissors (also forleft-handers!)ClearrulerToolimpressionWhat is drapability? Draping is a technique used to createthree-dimensionalclothingpatternsusing a garmentmodelbysecuring the fabric and placing itover the model to create the garment. Designerstypically use chiffon, which is costeffective and available in a variety of weights.Why arecurtainsuseful? Draping is used to achieve the desired pattern through directmaterialmanipulation, providing the ability to sculpt and create uniquedesigns.Draping is thereforethemain technique used intheproductionoffashion and high-end products.CurtainTerminologyYouNeed to KnowMannequin MarkingTerminology: 1.SHShoulderLine2. NBNeck3. Armhole/Armpit4. PLPrincessLine5. Apex/BPChestPoint6.BLBustLine 7. CFFrontCenterLine8. SSSideSeam9. WLCenterLine10. HBLHorizontalBalanceLineApex: highest point of bust,frontribdefines reference point CenterFront:Verticalthatmarks the centerof the front ofthegarmentLineCenter Back:The vertical line that marks the centeroftheback of the garmentSeam: Two or more edges of fabric are held together by stitchesTip: A diagonal line across the grain of the garmentthe fabricCross grain: PerpendiculartothesecondaryedgeSections of fabric withlongitudinalgrainonthesidesDarts:Designfeatures that helpfit garments around curvesPrepareyourgarmentshapeMark all stitches and seams Create guidelines for your garment, using what we learned earlier in the post Usethegiventerm as a guide, which will keep your drapeevene. Imitatingthe desired design and other seams using veneer tape will bring your garment to life.Apply styling tape over the entire bust, starting at the center front to the side seams. Repeat for the smallest part of the waist and the widest pointofthehip.In the back,the style tape should be placed horizontally at thelevelofthe shoulder blades(it should be 1/4of the distance between the neckline and thecenterline),going from the CB to the backofthearmholes.Measure theshapeofyourskirtMeasure:1. To measurethewidthof your front chiffonpanel, measure the style strip on the front of the skirt and add 4inchesto the vertical distance from the top of the neckline to the centerline, then add 3inches.BACKMEASUREMENTS: 1. To collect back body muslin panelwidthmeasurements, measure approximately2inchesbelow the arm tabs, at the widest point of the back, from the center ofthe back to the side seams, then add 4inches.To gather measurements for thelengthofthe back muslin panel, measure vertically from the top of the neckline to the centerline, then add 2inches.Prepareyourmuslin● Obtain muslin ofapproximately the same weight as the fabric you willbeusing.● Iron on your muslin foreasyandprecise handling and marking.● Usea tape measure and ruler toscoreapieceofmuslin,then tear with the grain toget a perfectly roundpiece.● Use the cutting and marking tools we’vecollected above to mark grain lines and other important referencepoints.● Tear your muslin to determine the grain and use the above measurements to cut out your front and back bodypieces.**NOTE:Eachbean should form arectangleandformablock.**● Turn the muslin insideout and iron the grain lengthwiseRemember that there are different weights of muslinwhenmaking muslin. .choosea muslin that is similar inweight to the final project.Note: Theimageabove is our basic lightweight chiffon, the bottom is a stiffer heavyweight chiffon.PrepareyoursquareofmuslinFront piece(toplacethe bodice lengthwise)1.Measure height from top of neckline to bust line and make a vertical guide here2. Measure from top (fullest point of bust) to center frontand add ⅛” for seam3. Go to theskinnycorsetpiece and measure 1″ from the top edge ofthelength and draw a horizontal line representing your CF4. Reference your neckline to thetop measurement and drop that amount anddraw a horizontal line representing your bust guide5Referto your overalltop seam measurement nexttoStep 2 and draw a horizontal line to represent your side seam6.Divide the numbers above and draw a horizontal line thatrepresents your balance guideBack block (placethe bodice lengthwise)1. Use thecenterof your back to measurethe armhole rib and add 4″tomakeiteasier to create a vertical for yourCreate2Guideblock. At the bottom of the muslin piece, measure 1″ from the bottom edge to actasa CB guide.3. Measure 3″ from the left side of the muslin piece and place a small mark to represent your neckline CB4.Measure your shoulder blade level downfromyourCBneckline and make a guide5. Make a fabric to represent your entire CB down to thesizeofthe armhole ribs, including ¼” for more ease6. From your CB to 11/4″Measure11/4″ArmholeRidgeMark to make guidewhichrepresents your back balance guide 7. Bend your CB guide and CF8. Iron Block 9.Press the CB and CF guideswith your fingers (use an iron to stretch the texture) the end of this post. Stay tuned for the next tutorial in this series where we’llexplain how to drape a basic corset.You’ll want to save your muslin pieces and skirtprepared, and you’llneed a marker, sewing needle, and scissors to learn how to place your muslin piecesonthepleated bodice. How to Make ClothingThere are many reasons why you may want to make clothing. If you’re interested in fashion design, have clothes in mind that you’d like to make yourself, or just need afewtweaks to something you already have,learn how to create a newone from fromzero.You don’thave to be a seamstress to learn how to make your own custom clothes.SEWINGPREPARATION 1Learnabout the different tools youwill need. Making clothes requires many different tools tosew,create patterns, and measure patterns to make sure they fit you. You will need to learn each type of tool and how to use it. You won’t be comfortable with all the toolsatfirst, but it will geteasierasyoupractice.Iron and ironing board. Anygood quality iron you already havecanbeused, but youmightendupwanting to buy a better quality iron.Youwilluse the iron to press downon the item you are sewing as yousew,as this willensurethat the seamwill stay open properly.Theseamistorn.Youwill use it when youmistakenlytearoff the wrong points.Mark the fabric withchalk so you know where to sew and where to cut. You need a verynice sharp pair of scissors that you specify for cutting fabric only, otherwise the scissors will dull faster and could damage or fray your fabric.Tracing paper tocreate patterns and modifythem as yousew.Ruler for drawing and measuring asyoucreate (both in the design phase and in the sewing phase).Tape measures,inparticular flexible tapes.Youwill use it to take measurements and make adjustments if necessary.needlestohold the fabric in place before you start sewing. Pins should be used sparingly as they can distort the fabric youare working with.2.Buy a sewing machine.There are basically two types of sewing machines, one that fallsunder the home/domestic category and one that fallsunder the industrial category. Bothcategorieshave pros and cons,sotakethetime to decide which one best suits your needs.[1]sewing machines tend to be more portable and versatile. They tend to do allkinds of sutures. However, they’renotgoodat speed and strength, and they’renot very good athandling heavy loads.Industrial sewing machines are more powerful and faster, but they tend to only do one type of stitch (likethe straight lockstitch). They do thepoint well, but aren’t very versatile. They also tend to take up more space.If you want to sew stretchfabrics, make sure your machine can zigzag stitch. Some machines have specific rackspacing, which can also beuseful.3.Know the parts of the sewing machine. Hopefully your sewing machine comes with amanual because it will tell you which way the bobbin will spin and where the bobbin case is. Butbeforeyoucandoanythinginteresting,you need to know at least the basic components of a sewing machine.Thespool pinsecures the spool and controls the direction of the thread as it passes through the sewing machine.Depending on the type of machine you have, your coilscan be horizontal or vertical. Thespool is essentially a mandrel wound with wire. You need to wind the bobbin with thread and put it in the bobbin case (located under the needle plate).Your sewing machine also has different stitch settings to help determine the stitch length for each stitch, the amount of tension needed to ensure the stitches arecorrectlythreaded, and different stitch types (if you have astitch type different sewing machine).The threadtake-up lever controls the thread tension.If the thread tension isnot at the correctlevel,thethread will knot andjam the sewing machine.You can ask a sewing shop nearyou if they offerlessons, or ifyou know someone willing to help you set up a sewing machine, or you can ask family members or capablefriends.4.Start simple. If you’re newto making clothes, you’ll want to start with simple designs, otherwise it’s easy to get frustrated and giveup.It’s best to start with skirts because they’re easier to make than a 3-piece suit and require you to measureless.Atfirst, try not to make clothes with buttons or zippers, like jackets. Userubberbandstomakeanapron or pajamas. Once yougetyourhandson your tools and your sewing machine, you can start makingprogress. 5.Make connections. The best way to getthemostoutof your final piece is to dosome test apparel beforehand so you can tweak the design and make whatever changes youfeelareappropriate to the final piece.Itis recommended to use offcutsof the same material as the final part.6.Take the appropriate measurements needed to completethe pattern.Even if you’re making agarmentbasedon a pattern you found somewhereratherthanyourown,you’ll still need to measuretomake the garment fit when you’re done.For pants you will need tomeasure the following measureme
Read More
What is Free Hand Sketching? Free Hand Sketching is used to transfer ideas from the abstract world of engineering to the real world in 2D and 3D. Thenotation is the international engineering language used for everyday communication in the engineering community.Freehand drawings are also used to quickly represent an idea in graphical form to non-technical people.It improves communication between all team members and between clients. TheFree Hand Sketch is one of those sketches without gauges.The image was drawn with a pencil and an eraser.These parcels are drawn before the actual parcel of each type because it takes less time.Having drawn such a picture, after careful consideration, make necessary changes if necessary.The actual drawings are then prepared. Freehand drawing tool.Drawing freehand sketches requires the following tools.1. Soft pencil.2. Eraser.3. Sharper.4. Drawings.5.chart table.The importance of freehand sketching.Freehand drawing is very important in practical work, because the draftsman must check the drawings of each object with the engineer.When checking a complete drawing, a lot of time is wasted making changes if necessary.Since there is less time for freehand drawing, one must first rely on such drawings.Principles of freehand drawing.Freehand drawing should follow these principles: 1. To see through the object, think about its purpose and concept.2. Select View to examine more detailed aspects. 3. Specify the space on the drawing according to the view size. 4. First, draw light lines so that excess lines can be erased easily.5.Scale and rulers are not used when drawing, but the proportions and proportions of different parts of the object are taken into account.6. First draw horizontal lines, then vertical lines and finally arcs and circles.7. When the diagrams are completed, write clear scale bars as appropriate.Freehand line drawing.1. Line sketch. Lines are the most important part of freehand drawing because sketching is done with different lines.Straight lines can be divided into different lines such as oblique lines, horizontal lines and vertical lines.Drawing straight lines for the first time is a daunting task. Mainly results in curves and arcs.This occurs when the forearm is in a fixed position. So when drawing straight lines, it is important to move the forearm. Basically when drawing horizontal straight lines.The distance between the hand and the tip of the pencil should be at least 40 mm, and the hand should rest on the edge of the paper.Draw straight lines with thumb and forefinger. The most important part of sketching straight lines is that your movements should be done in a controlled manner.You can also draw diagonal lines by changing the position of the arms.The easiest way to draw long straight lines is to draw short lines and connect them together.By doing this, there will be little or no risk of error. (one). Sketch of vertical lines.Draws a vertical line from top to bottom of the drawing page.Drawing vertical lines takes a lot of practice.However, you can draw vertical lines using the edge of the paper as a guide and your hand as a scale. (As shown below).(ii). Horizontal line sketch. To draw a horizontal line, the hand and forearm should be turned at the elbow, with the edge of the hand sliding horizontally on the paper.When drawing a horizontal line, first try drawing a line in the air to see how the line works.Then, exerting light pressure on the tip of the pencil, lightly draw a horizontal line.(3). Diagonal sketch. Diagonal Draws diagonally from one corner of the page to the other.Typically, a right-handed person will draw a diagonal or diagonal line from the lower left corner to the upper right corner of the paper.However, sketching can be much easier by simply turning the paper over to where you want to draw the diagonal. 2. Rectangular sketch. Therectangle is a common shape in technical drawings.To draw a rectangle with a freehand sketch, a different technique is used.They can be drawn in many ways, but the easiest way to draw a rectangle is to draw a vertical or horizontal line and rotate the paper at a 90 degree angle.3. Curve sketch.Curves in graphs can be arcs, circles, etc.To draw a circle, first draw a center line and mark it with a radius.Forms the radius in a box in which you can draw a circle.First draw the upper left part of the circle (turn the pencil counterclockwise), then draw the lower right part of the circle (turn the pencil clockwise). pattern gradingOnce your basic size pattern has been created, adjusted and perfected, what is the next step? You will use what is called pattern grading to adjust your base size pattern to create other sizes.There are different approaches to scoring modes, but the end result is that you have consistent visuals in a variety of sizes. In the end, you will have measurements for each size in the range.What is Schema Staging Schema staging is the process of changing the sample size (sometimes called the base size) to a smaller or larger size. Pattern grading is done using size specification sheets. Grading does not create new shapes, it increases or decreases the size of the original shape of the garment.Image source History of thefit notation The primary purpose of thefit notation is to proportionally increase or decrease the size of a fit while maintaining the fit and shape of the garment .Historically, the science of grading developed in the 19th century due to the advent of mass production and commercial models. Models should be classified in a range of sizes to properly fit different body types. Today, clothing manufacturers and pattern makers use a medium fit (usually a size S or M) as a base, which they then scale up or down to larger or smaller sizes.Filing Methods There are 3 basic pattern filing methods for the:Cut and UnrollThis method is considered the simplest.This is done by cutting the pattern and unfolding the pieces by a certain amount to raise or lower the level. The only tools needed are a pencil, ruler, scissors and tape measure.Cut and spread filing methodShifting the patternThis method consists in shifting the pattern by a constant distance. The designer redraws the outline to produce the same result as the previous cut and flatten method.
Read More
■ Pigments are expensive and so are colors. The basics of color mixing are important for producing a specific color that may not be used often or ever in other paints. So your spending on supplies won’t burn a hole in your pocket.■ There may be a case where the color you cook is not cooked at all (mainly specific greens in the landscape). Knowing how to mix colors allows you to get a finished green in the shade that suits your needs.■ The advantage of buying premixed colors is that you are guaranteed to have the same shade every time. But mixing colors can be so addictive that you might prefer not to buy the tubes, opting instead to cook recipes in your favorite colors.■ Color mixing is a required course for any color manufacturing business or anyone who aspires to one day produce hand paints.■ Mixing colors is addictive. Most artists thrive on studying color mixing and delivering unique recipes to the world because its scope is limitless.Points to remember when mixing colors –■ To get the most brilliant colors possible, make sure that the colors you use contain only one type of pigment and not several pigments. You can usually find this information on the color container itself or on the manufacturer’s website.■ Remember that you need at least 3 colors to make something look 3D – dark, medium and light. This is when pitch studies come in handy.■ If you want to darken a light color, you only need a slightly darker shade.Conversely, if you want to lighten a color, you need a lot of colors to lighten it.° Be careful when working with dark colors like brown or black, as lighter shades are needed to change the tone.■ When mixing colors and painting on larger areas, mix larger amounts of colors so you don’t have to prepare them again when painting. Also because the next time you mix colors you won’t get a different color from the original. Most of the time, artists mix colors based on their intuition.■ It is important to identify warm and cool colors before mixing. For example, to create a warm blue sky, if you combine two warm colors, the result will also be a warm color, while combining a warm color with a cool color will result in a relatively neutral tone.■ One of the most important pieces of information about mixing colors is to have two cans of water, one for warm colors and one for cool colors. This is to ensure that the color does not become cloudy.■ If a color seems too strong or too vivid, soften it with a complementary color or a touch of brown.This is called “lifting” and helps keep the color from looking dull and washed out.■ It is always recommended to test mixed colors on paper or canvas from time to time, as colors on paper look different. You don’t want your final piece to be a different color than you imagined.Color Mixing Challenge: Go Further! Print out Google’s Color Mixing Challenge and challenge yourself by starting to mix primary colors into warm and cool colors.You can learn a lot from this activity. It further expands your knowledge of how colors work together in a medium. Frequently Asked Questions1. How do I get a higher density color combination?Answer: Limit the number of colors with pure pigments when mixing colors.This results in greater resistance.To make lighter or muted colors stand out more, paint them next to contrasting darker colors. For example, a dark green will be more intense if surrounded by a lighter color such as lemon intensity. .2.Can you mix acrylics and oils?Answer: When painting on a porous surface, a layer of plaster or acrylic is applied before painting, or the surface must be primed. So while you can use oil over acrylic, you should never use acrylic over oil. Also, never mix oils with acrylics when painting on any surface. This is because acrylics dry out and trap moisture, while oils take longer to dry, causing the paint to fade or crack.3. Do you mix all the colors in this row on your palette or mix them as needed? Did you mix a good amount of each – enough for an entire painting? What if we don’t like wasting expensive paint?Answer- For oil paintings, it is possible to mix the colors in batches at the beginning of the painting.They dry slowly and have plenty of time before drying. There is also the motivation to continue and finish the painting. But if you’re going to take a break from work, you can lightly cover the paddle with plastic wrap and store the mixing bowl/paddle in the freezer. It will stay wet for 7-10 days unless the paint is applied very thinly.Acrylic can be kept moist by mixing it in a shallow plastic container – just give it a light spray of water every now and then to keep it moist, and when you want to finish your session be sure that it is moist and put the lid on. on.With watercolor, you can let it dry and reactivate it with water if necessary. The most convenient medium.4. What is the exact color of the peacock, in particular the color of the head and the feathers?Answer – The peacock has a blue to turquoise gradient on its neck.Turquoise can be created by mixing Prussian blue with dark yellow. Or, you can choose from the following colors: ultramarine blue, sky blue, teal and green. A touch of phthalo green and burnt ocher is also needed to balance out the blues.5. What is the most important tool when choosing colors?A: Tonal contrast (the contrast between light and dark) is the most powerful tool in painting. So if color is an issue, pick a color and try black and white, an opaque medium. In the last step choose 2 colors plus black and white and so on. This way you can control the composition.6.Do the color combinations not only vary depending on the color temperature we use, but also depending on the brand?Answer: Different brands name colors differently, especially the acrylic series. Even in the case of watercolors, the appearance of the color can vary from brand to brand. For example, one brand of Payne Gray may be bluer than another. The color ofmay also vary with time and atmospheric conditions.Choosing the right color depends on whether you are painting something from your life or referencing a place you know. Careful observation and lots of practice with color mixing – mixing warm and cool colors, changing values, is the key to your success.7. How do you mix colors?Answer: Pigments can be mixed on a palette to create different colors on the palette before being applied to the surface whether it is canvas, paper or any other surface.Or it can be blended directly onto the surface as an impasto artwork, or wet-on-wet or wet-on-dry techniques.It also depends on the medium and the technology used. Opaque or heavy paints, such as acrylics or oils, can be mixed using a knife or paintbrush with a raised handle, while water-based mediums, such as watercolors , can be mixed with wet-on-wet techniques on paper or brushes on palettes In conjunction with. It is a style that incorporates the artist and the colors he likes to choose.8. How to build the perfect printing press?Answer: The trick to getting a good range of purples is to use reds and blues without a tendency to yellow. If there is a hint of yellow, the result will be more of a brownish purple or grayish purple.How to use thecolor scale Although there are no hard and fast rules when choosing a color scale, you should consider the overall impression you want to convey. Color relationships such asMonochrome and Analogy are generally easy to coordinate and apply.In addition, they are naturally calm and reserved. However, they have very little color depth, which can lead to a lack of contrast if not taken into account properly. The combination ofCompliment, Split Complement, Double Split Complement and Triad provides rich color depth and high contrast, making it more vibrant. However, this can lead to saturated colors if not applied correctly Color Emotions and MeaningsColors can also have positive and negative psychological effects on people.These are called color moods or meanings. The table below provides some common examples:Meaning of colorsRed Comfort, Blood, Beauty, Love, Heat, Passion, Aggression, Fight, Anger, Hunger, NegativityBlue Cool, Peace, Faith, Knowledge, Cleanliness, Chew , Depression, BulkYellow Heat, Hope, Wisdom, Happiness, Caution, Care, Envy, EnvyPurple Luxury, Delicacy, Wealth, Excessive, Mourning, Indulgence, Joy, Healing, Nature, Poison, . Le weaving process involves the interlacing of threads or the interlacing of loops. This makes knitted fabrics very different from woven fabrics. Another difference is that knitted fabrics are more flexible and can be easily assembled into smaller pieces.This makes the knitted fabric ideal for making socks and beanies. Commonly used raw materials forknitwear are wool, cotton, chemical fiber, silk, and polyester coated cotton. This allows the creation of many types of knitwear and is thus suitable for different styles of knitting fashion. Common knitted garments include sweaters, sportswear, underwear, t-shirts, and knitted accessories. Knit suits, although less common, are quite comfortable and stylish.Knitwear is most popular in fall and spring. It’s amazing how knitwear has made its way into summer wardrobes over the past decade! One of the reasons for this trend is the comfort and durability offered by knitwear. Another reason is the unconventional use of materials by emerging fashion designers. The versatility of knitting allows designers to push boundaries and explore new knitting trends.Top Knitwear Trends 2022 1. Sleeveless KnitwearSleeveless knitwear is perfect for fall and spring. This is because the weather is neither too hot nor too cold. Sleeveless knits are a great choice for casual outings. For special occasions, bright and warm colors may be preferable to make an impression.Sleeveless knits are versatile. It can be worn alone over a basic t-shirt or under a light jacket. Those looking for a bold fall/spring style can wear sleeveless knit tops in a variety of colors, necklines, and knitting techniques.2. Skinny KnitSkinny Knit is soft, chic and ultra-thin.They are suitable for the catwalks as well as for the street! The advantage of sticky knits is the sheer look and stretchy texture of the fabric. This allows for flexible movement and minimal restriction for the wearer.tops and dresses are a popular choice for clingy knits. Ready-to-wear knits are also great party looks, especially for a fall or spring night out.3. Sweater A cozy oversized knit is a super comfy staple. Knitwear, however, requires subtle styling. This is especially true if you are dating! An excellent combination is classic stirrup leggings and a loose sweater.Some Parisian brands have released split- knit turtleneck sweaters that are oversized and paired with minimalist leggings. It creates an instantly chic style, especially when paired with heels.4. Long cardigansCardigans have been in fashion for a long time. Their popularity fluctuated, but they persevered.Today, the cardigan has been redefined for the pandemic era. A good sweater never fails, especially when a quick virtual meeting is approaching. Needless to say, the cardigan is coming back into fashion. In fact, some designers have referred to the long cardigan as the de facto “at home” style. Thelong cardigan is versatile and can be worn with more casual outfits.Pair them with your favorite jeans and flats or layer them over loungewear. A new trend in cardigans is the addition of a belt. It makes the sweater look like a chic bathrobe.5. Knit top and skirt A knit top and skirt set is a staple in any wardrobe.This classic coordinating look is a chic look that never goes out of style. It doesn’t take much effort on your part, and best of all, you don’t even need any props! The knit is great because you don’t need to add it. Another advantage of knitting is that it can be easily layered with other types of knitting. For example, a jersey dress can be worn with a knitted polo shirt, tank top or t-shirt or with long sleeves.
Read More
Topics Covered:Switching to the Color WheelProportional Mixing of ColorsMixing Equal PartsMixing Ratio SectionsMixing Proportions of Primary ColorsThe Importance of White and Black in Opacity Mixing Colors in the bend■ Can any formula be used or done for toning?■ Dry color cards/mixing recipe book■ The different types of cards above and what each card means■ How to make non-tertiary colors and colors often used by artists like brown, white , black, gold, silver (secondary colors and tertiary colors)■ How to mix colors for the different complexions of a portrait?■ What is visual isolation and how does it help identify the correct color?■ What does a cloudy color mean and how do you not end up mixing cloudy colors (do’s and don’ts)■ When is there color separation on paper? Is it good or bad to see color separation in artwork?■ Techniques for identifying colors from reference images to mix colors well■ What is an undercolor and how important are thin layers of an undercolor or an oil painting?■ Making Different Types of Greens■ The Importance of Color Mixing■ Things to Remember When Mixing Colors■ Frequently Asked Questions Have you ever wondered how designers, creators and artists come up with color combination? perfect colors?Have you ever wondered how paint is applied from a tube or pan onto paper, perfectly placed next to the color it enhances?How do we get the perfect green we want for our shade trees?Do you want to know which colors are the perfect match? The answer is color theory and color mixing. Color theory is a practical combination, the detailed study of art and science used to determine what colors go well together, how we can get a particular color, and the study of different terms for shades. In 1666, Sir Isaac Newton invented the color wheel and mapped the color spectrum into a circle, or color wheel. It is the basis of color theory as it shows the relationship between colors and how they react to each other or side by side.Understanding the color wheel is important to the study of color mixing.Mixing the color (spectrum) of light and mixing the color of paint can have very different results. The main color of the mixed light produces white, and the main color of the paint property produces black, gray, or brown.Check out the color wheel blog before you read more about mixing colors. This is the basis for understanding color mixingProportional mixing:Mixing in equal parts: The basic mixing formula involves mixing two or more colors in equal parts. If two primary colors are mixed in equal amounts, the result is a secondary color:1 Red + 1 Yellow = Orange1 Blue + 1 Yellow = Green1 Red + 1 Blue = Violet Mix two secondary colors in equal parts the quantities creates a tertiary such as –1 Orange + 1 Green = Olive1 Violet + 1 Green = Slate1 Orange + 1 Violet = Brown Mixing two tertiary colors in equal quantities creates a quaternary such that:1 Chestnut + 1 Slate = Cedar1 Slate + 1 Olive = Sage1 Chestnut + 1 Olive = CoffeeMixing equal amounts gives a clean image.Mixing ratio –To create a wide range of new colors, you can mix primary colors using different colors in different proportions to each other. Mixing paint using a proportional color mixing formula ensures that a specific color can be reproduced, allowing designers to provide consistency and a unified look in color mixing.Proportional color mixing involves simple ratios, like using twice as much red as yellow, or complex formulas, like mixing one part blue, two parts red, and three parts yellow. Each combination produces a new, unique and interesting result.Proportional color formulas involve mixing two parts of one primary color with one part of another primary color to create tertiary colors as shown below;2 Red + 1 Blue = Magenta2 Blue + 1 Red = Violet2 Blue + 1 Yellow = teal2 yellow + 1 blue = yellow green2 yellow + 1 red = amber2 red + 1 yellow = vermilion Primary color mixing ratio:To get orange, you need to mix the primary color red and yellow.The mixing ratio of these two colors determines the type of orange you get when mixed. For example, if you add more red than yellow, you get red-orange. Similarly, if you add more yellow than red, you get yellow-orange.also depends on the color temperature you choose. So experiment with the shades you have.Experiment with different combinations and mixing ratios, and document your results so you can achieve the same color in the future. So it’s easier to say that mixing different shades of red with different shades of yellow doesn’t produce the same orange.It all depends on the secondary colors and shadows you want to create. If you mix hansa yellow with carmine, you get a different shade of orange than garcinia.Are there different shades of red, blue and yellow available for purchase?Yes! You can choose from a variety of primary colors in different shades.Here are some examples:Blue: Cobalt Blue, Sky Blue, Ultramarine, Caribbean Blue, Venetian Blue, Prussian BlueRed: Cadmium Red, Scarlet, Carmine, Crimson and Venetian RedYellow: Naples Yellow, Garcinia, Cadmium Yellow, Lemon yellow and ocher yellow Importance of white and black in color mixing –Although it seems logical that to lighten a color you need to add white to it, white reduces brightness or saturation, so even though it lightens the color, it takes away its vibrancy. It produces a tint of that color and makes transparent colors opaque. It also cools the color.This is especially noticeable in the reds, which change from warm red to cool pink when using titanium dioxide.Watercolor is transparent, so to lighten, simply add more water to the paint to make the paper shine.Black does not add darkness, but creates haze and tends to smudge base colors rather than just darken them. Of all the common blacks, Mars Black is the darkest and most opaque, Ivory Black has a brown undertone, and Lamp Black has a blue undertone.In some cases, however, black has unique value, such as the range of greens it can produce when mixed with yellow.The Importance of Medium Opacity in Color Mixing – Different pigments have different properties. Some pigments are so transparent that they are clearly visible under several coats of paint. Others are very opaque. If you take this into account, it can help you layer your work even more.Watercolor mixes differently than acrylic or oil paint.The use of white and black is discouraged in traditional watercolor painting, and acrylic and oil paints cannot work effectively without both. It is important to know which category your artistic medium belongs to in order to better understand the painting process.It is important to understand a summary of paints and other pigment-based materials in order to better understand the mixing of colors beyond the artist.Almost all mediums are made from the same source of powdered pigments. Some colors come directly from nature, while others are artificial or synthetic.When powdered pigments are mixed with various additives called binders, the following are produced – Oil Paints: As the name suggests, the pigments are mixed with an oil (usually linseed) in a tube, which dries slowly and more easily. to mix together. It can be used directly from the tube or diluted with a medium for primer or varnish. Oils retain their strength after drying, unlike water-based paints, which tend to be darker or lighter in color when dry than when wet.Water Soluble Oil: This coating is miscible with conventional oils. If used in pure form, the water can be used to clean brushes.Oil Sticks: These oil sticks contain wax which sticks the paint to the stick, drying more slowly than oil. Solvents are the same as paints.Acrylic: This medium contains an emulsion which, when dry, forms an insoluble, water-resistant plastic surface. It can be used diluted with water or removed from the tube undiluted. Texture paste can be added for impasto or 3D effects.It is recommended to change the water in the tank and clean the brush well after each painting to get rid of the paint stuck to the brush. It can be used on any oil-free surface, from paper to cardboard and canvas. Acrylic does not reactivate like watercolor or gouache. So, to test a single color among many, mix them in small amounts until you get the formula that works. Otherwise, you’ll end up with a lot of unwanted colors on your palette that could go to waste.Gouache and Poster colours: These colors contain a binder which remains water-soluble after drying. Pigments are generally coarser or grayer than watercolors, and therefore more opaque or opaque. It can be reactivated for further mixing with water.\ Watercolors: Premium watercolors from the highest quality base pigments. They are made by adding a special water-soluble gum arabic.This medium is used on watercolor papers that have a smooth, rough or somewhere in between texture. It is important to know that although it is a transparent medium, some watercolors are more likely to be opaque. It lacks dynamism and dries dull on paper. One of the best examples is black. This is why artists recommend that learners mix a color that looks like them rather than using a color straight from the tube, except to achieve a specific shade.Watercolor pencils: These are used to draw lines, add texture and depth, or animate on paper after colors have been placed. Pastels: Here, the paint is put into sticks with distilled water and a minimum of binders. Some are wrapped in wax paper to prevent breakage and come in stick form. It is often used on colored papers with texture or “teeth” to keep paint particles dry. Spray fixatives prevent rubbing, but tend to darken pencil work.It is believed that a frosted board was added behind the glass to prevent the work from touching the glass. Ink: Ink is available as waterproof and water soluble ink. By using very fine pigments, premium inks can provide white clarity, which can be increased by adding layers when using waterproof varieties. It can be used with brushes, sponges and more. Ink can be loaded into angled pens to accommodate different line widths. The nib should be cleaned regularly.Can any recipe be used or made to mix colors? Thehas color mixing formulas popular with artists to achieve the desired color. This is especially true in the case of beautiful colors obtained by mixing primary colors such as ultramarine blue with earth tones or neutrals to obtain colors that are desaturated and tend towards the colors of nature. These colors are subtle and visually pleasing.Here are some examples of neutral color formulas widely used by artists:Ultramarine + Red Brown/Vermilion = Desaturated VioletUltramarine + White + Rose/Red Tint = LavenderLavender + Ocher = Yellowish Gray is the color derived from Ultramarine Bluewhich is often the result of color wheel research and found to be the most effective. While most artists mix colors empirically, some admit to mixing colors intuitively when painting. It is therefore crucial to know which color complements another color you are using.A popular example is to use a deep, warm purple (a color that looks a lot like plums) next to yellow, as the two colors are opposite on the color wheel and therefore complement each other. If you study architectural paintings, you might notice how this color is used to indicate a building or a shade on a yellow door.Stem and Color Chart/Mix Recipe Book. The different card types above and what eachmeans Before you start using any color on any paper, always take a small piece of paper and paint that color on it. You can only try one color at a time, this is called “proofing” or working on different cards. Due to paper characteristics, colors will appear differently on different papers. The different types of charts you can create yourself are:Color wheel■ Mixed charts (for all media)Mixed charts are structured as a grid with an equal number of lines and of columns.For example, you can generate an 8×8 grid and paint a single color in the first row and column in the same order, then find out by combining one color in the row with one in the corresponding color in the column. Watercolor Blending Card ■ Glass Card (for watercolor)Because watercolor is a transparent medium, the glass card can help you see what the first layer appears under the second transparent layer. Start with the lightest shades first, such as yellows, as they are more likely to be smeared with color.Choose high quality paper for this, as lighter colors look better on higher quality paper. Watercolor Glass Diagram■ Two Color Mixture DiagramMixes two colors in different proportions to identify unique color mixtures■ Value DiagramA color can be represented at different values in an image.Observe carefully. It indicates how dark or light the color is, depending on the light and dark areas. Before working on a value map of any color, first try a monochrome study using only black. ■ Palette ChartThis tells you what a mixed color actually looks like on paper versus what it appears on apalette How to create non-tertiary colors and colors that artists often use, such as brown, white, black, gold, silver (except secondary and tertiary colours)■ White:White is a color that cannot be mixed with other colours. There are two kinds of white pigments known to us: titanium white and zinc white.If the tube says “China White”, it is mostly zinc with occasional traces of titanium dioxide. Zinc white is cold and relatively transparent, while titanium white is warm white and opaque.Ideally, it’s best to use white to accent the paint, rather than mixing it with other colors, as this can make your paint look dull.■ Brown:A basic brown can be created by mixing the three primary colors in nearly equal amounts. The amount of color can be varied to achieve different shades of brown.Alternatively, browns can be created by combining the following colors:■ Orange + BlueIt is important to note that the colors should be mixed in equal amounts. This may vary from the previously mentioned recipe, depending on the oranges used.Another way is to mix blue with yellow to make green (e.g. Prussian green). When you mix it with a red or a red variant like vermilion or roux, you get a very dark shade of brown that can replace black in some areas.Prussian Green + Orange/Vermilion■ BlackThe artist’s suggestion to mix all the colors in your palette black is no joke.When you mix red, blue, and green, you get the color closest to black. Nothing more than:Red + Blue + (Yellow + Blue) Mixes colors to form brown, black, gray and gold■ GrayGray is essentially a combination of black and white.Warm grayWarm gray is obtained by mixing a small amount of brown in a basic grayBlue + yellow = greenGreen + red (in small quantities) = brownGray + brown = warm grayCool gray1 1 part blue + part black + small amount of whiteFinal color will have a cool tone■ SilverSilver in any image is simply gray with a shiny finish. To convey the silver in your paint, try mixing any of the following and marking the highlights with white for reflectivity.Ultramarine Blue + Burnt Brown = Warm GrayCobalt Blue + Burnt Brown = Soft Silver GrayPhthalo Blue + Burnt Brown = Greenish GrayPearl and shimmer pigments are available if your objective is a shiny effect.■ GoldIf an object is related to gold, artists tend to associate it with colors classified as yellow or brown. If the metal is antique, it may have a hint of olive green.However, if you want to mix your own colors from the primary colors, you can try this formula:1 part red + 1 part yellow + 1 part blackYou can adjust the tint by adding a small amount while mixing primary colors until you get what you want gold.How dogray and gold matchHow do portraits of different skin colors match?The skin has a hot or cold appearance.People with lighter skin usually have cooler blue undertones. However, people with darker skin tend to have warm undertones like olive green. You can make an informed decision about choosing a color by carefully experimenting with shades and knowing what you are trying to achieve.The first layer of the portrait must be marked with the background color. This applies when working with watercolors.One or two layers can be built on top with scarlet, orange, raw tan, burnt tan, burnt tan, etc.In the case of oils, these may be the colors normally chosen for primers. Skin tones can be created by mixing base browns first. This is done by mixing equal amounts of the three primary colors.For darker skin tones, you can change the tone of this blend by adding a small amount of red, yellow, or brown, depending on the color you want.You can add black for a deeper color.
Read More
Types of ClothingFashion is a trillion dollar industry and you can be sure that there are many different types of clothing.Clothing worn at home, at work, in society or when practicing sports and leisure activities. We also provide clothing for important occasions such as weddings and graduations. Clothing is considered essential if there is an event or activity where we will not attend naked.So what are these different types of clothing?TypeGarments Garments, also known as garments, garments, or garments, are generally articles of cloth and other materials worn on the human body.There are “types” of clothing depending on the environment:● Business attire – worn for professional purposes● Casual attire – worn as standard attire● Evening attire – worn at events such as weddings● Underwear – worn for support and Underwear and/or accessories worn for supportSportswear – worn for physical activities such as runningand “type” based on gender and age:Baby clothes – worn for infants and toddlersChildren’s clothes – worn for children 2 years and older Dressing● Men’s clothes – usually worn by men● Clothes for women – usually worn by womenBut clothing can also be divided into different types of clothing according to clothing:1. Bloomers2. Cover-ups3. Tights4.Bra5. Corset6. Kaftan7. Vest8. Cape9.Coat10. Corset11. Dress12. Cargo13. Jacket14. Jeans15. Sweater16. Jumpsuit17. Kilt18. Kimono19.Bloomers20. Leggings21. Socks22. Tights23. Briefs24.Trousers/pants25. Petticoats26. Jumpsuits27. Ponchos28. Pajamas29.Apron30. Shawl31. Shirt32. Shorts33. Skirt34.Apron35. Socks36. Sweater37. Swimsuit38. Bear39.Tie40. Leggings41. Top42. Sweatsuit43. T Chanvre44.WaistcoatAnd then there are different types of cultural clothing:● Traditional Japanese clothing● Traditional Indian clothing● Traditional Scandinavian clothing – if you like simple Scandinavian aesthetics, check out this issue A roundup of the best sewing patterns in Scandinavia! Chapter Just Three Examples! As you can see, there are so many types of clothes!Different Types of ClothingTo make this the most definitive list of types of clothing, let’s take a look at the list of clothing above and break it down further with descriptions and photos!BloomersBloomers are undergarments worn on the lower body, usually with an elasticated waist and usually with lace at the hem of each leg.Invented in the 19th century, they were looser and lighter than the thick fabric dresses worn by women at the time.Although she did not design the bloomers, they are named after Amelia Bloomer, a 19th century women’s rights activist.Shirts Shirts are garments for the upper body in women’s clothing. Similar to shirts, shirts can be:Long sleeveShort sleeveSleevelessShirts are generally made of a lighter material than their “shirt” counterparts and often have more interesting details such as lace collars, ruffles, ruffles, pins and more. BodysuitThink of the bodysuit as a bodysuit with a click opening under the leg and you’re on your way!Bodysuits are often made of skin-colored jersey so they can look demure over low-cut dresses.bra Thebra is worn by women to support their breasts. They come in different styles, as well as different cuts, shapes, and levels of support.Corset A corset is a form-fitting upper body garment with shoulder straps. A corset usually does not have a skeleton, but is made up of several parts, like a corset.The most famous and recognizable corset is the one that John Paul Gaultier made for Madonna!Kaftan Thekaftan (also spelled kaftan) is a loose-fitting garment popularized by Christian Dior in the 1950s. They are traditionally left open in the front, although in the 2000s they were often closed as simple dress dresses or cover-ups.CardiganWe all wear cardigans knitted by our grandmothers, right? Like sweaters, cardigans are made of knitted fabric and have an opening in the front.They can be zipped, but button openings are more popular.They were popularized by Chanel in the 1920s as part of two and three piece dresses.Capes Capes are worn as outerwear and cover only the upper body, or can be extended to the thighs, knees or even ankles.They usually have slits in the front to allow the arms to stretch out if necessary.Coat Thecoat is similar to a jacket but has a longer length and is designed for colder weather.They are more like winter clothes and can be made from heavy fabrics like wool and lined before being added for extra warmth.Corsets Corsets were historically worn under clothing such as dresses and tied tightly to “tighten” the waist to make it as small as possible.Since Vivienne Westwood included the corset in her collections in 1987, other fashion designers have followed suit and the corset is now a common garment type in dresses and separates!Corsets differ from corsets in that they use “pillars” or a “skeleton” to provide structure and support. It can be a metal, plastic or polyester skeleton.DressA dress is a garment that falls from the shoulders and covers the torso, hips and thighs. It can be fitted or loose and airy. Thestyle variation means dresses can also be strapless, requiring them to fit close to the bodice or fall to any length between thigh and floor.If you want to know more, I have a detailed guide on the different types of dresses.Overalls Overalls worn by women during the World Wars, originally men’s overalls.They consist of trousers, front and back, held in place by Moët straps. Now worn by women and children more than men,dress pants have become a staple and are also made from denim, corduroy and vibrant prints!JacketThe jacket can be casual or formal and can be worn as a suit or outerwear. Trench coats and bomber jackets are considered casual outerwear, while tuxedos and blazers are tailored jackets.Jeans Originally known as a cotton fabric woven in Nîmes, France,became a more widely known term in the 1800s for Levi Strauss’ denim garments.Jeans for the 2020s come in many styles, materials, and fits, as well as different denim colors!I have a great article on how to make the DIY jeans pictured below!Jumper In the 19th century, a jumper was a short garment resembling a coat for men. These are the terms currently used in the UK to refer to sweaters.Learn more about sweaters with our excellent guide to sweater types here!JumpsuitJumpsuits are the trending clothes of the 2020s – with sewing patterns created by independent pattern makers around the world!This is a full body suit, traditionally with long sleeves and long legs, also known as a “flight suit” or “water bottle suit”.Kilt Tartan or tartan fabric is used in the manufacture of kilts, worn as skirts and hanging from the waist.Traditional men’s kilts may be fully pleated, or the ends of the fabric may be left unpleated, overlapping the front of the body. Thewomen’s kilt isn’t all that special, with styles influenced by seasonal trends.The kimonoThe kimono is a garment from Japan that is often used as the basis for dressing gowns, but since the late 19th century, kimonos have been frequently adopted by fashion designers as a clothing trend.BloomersAlthough the bloomer is a very historic item of clothing, in the late 1960s fashion designer Yves Saint Laurent made the bloomer fashionable.These are baggy pants – like pants! – but only gather below the knee.Leggings Leggings, worn over the legs, have been popular casual wear for many years, but have historical roots in medieval coats!Modern leggings are made of a stretchy material – often knitted – and wear a very close fit.They also come in different lengths, from ankle length to low rise cropped pants and more!LeggingsI remember being a schoolgirl in England in the 80’s and being forced to wear leggings!At the time they were cylindrical, woven by hand and worn on the legs, between the knees and the ankles.They can be slipped under our schoolboy pants or worn with a mini skirt for a stylish look.LeotardOne of my childhood hates, the leotard covers the body from the crotch to the shoulders. First worn by French trapeze artist Jules Léotard in the 19th century, thehas since become popular with disco enthusiasts and dancers alike. Theis now made in a variety of fabrics to meet both activewear and casual wear needs.UnderpantsUnderpants are underwear worn by women on the lower body. Also called panties in some countries, they can be made of knitted cotton fabric, lace, mesh, etc.They are often trimmed with gathered elastic or picot for decorative effect and to trim the raw edges of the fabric.Culottes / CulottesWorn on the lower body to keep the legs warm and covered, culottes (or culottes, as they are also called!) are a repeat of early 19th century culottes and have been worn by women ever since. 1920s.Trousers and slacks in those days were baggy, and it wasn’t until the 1970s that it became acceptable for women to wear slacks for both casual and formal events.Underskirt The Underskirt is an undergarment worn under dresses and skirts as an extra layer of insulation.They’re not worn as often in the 2020s as they were when I was growing up in the 1980s – I remember my grandmother buying a bunch of silk fabric to make petticoats for her and her sisters.Jumpsuit Unlike the jumpsuit, the jumpsuit has a shorter leg length. Made from a variety of materials and cut in a variety of styles, a jumpsuit is a great modern garment – if you can take it all off to go to the bathroom!Playsuits are also often referred to as jumpsuits when it comes to products designed for women!Poncho Ponchos come from South America and look a lot like large blankets with a simple opening through which you can put your head.My other half has a few things he uses to keep warm in the winter.They are available in solid colors or in different patterns when woven.Pajamas pajamas are worn as sleepwear by women, men and children, but are increasingly preferred by fashion designers today.This trend of “nightwear” as “evening wear” began a century ago in the 1920s. !It is a long piece of fabric that can either be wrapped around the lower body and tied around the waist, much like a skirt, or wrapped around the torso and tied around the neck, much like a skirt. skirt. Shawl Another square fabric garment in which the shawl serves as a cover. This material can be a light evening dress or it can be cut in wool for extra warmth.Elongated shawls are called shawls!Whether worn indoors or outdoors, the shawl is a practical piece to wear around the shoulders.ShirtsShirts are garments worn on the uppe r body. It traditionally has a center front closure and a button opening so the shirt can be worn and buttoned.Shirts are worn by both men and women as casual and evening wear.I have a great guide for many types of shirts!ShortsWomen have worn shorts since the 1920s – a comfortable item of clothing, though often exaggerated by fashion designers and worn as evening wear for sleepovers.
Read More
Moisture RecoveryFiber*Cotton 7 -11 4444Linen 12Silk 11 4444 Wool 13 – 18Acetate 6.0Acrylic 1.3 – 2.5Aramid 4.0 Glass – 4.0Glass. Thesmoothsurfacemakesiteasytoremovestains.Acetatepreventsdirtfromfalling.Thesmoothsurfacemakesiteasytoremovestains.Triacetatepreventsdirtfromsettling.Thesmooth surface allows stains to washoffeasily.Nylon6.6prevents dirt from settling. Smooth surface allows stains to washoff easily Polyester Prevents dirt from settling.
Read More
Clothing – suits, dresses, skirts, shirts andmore.Household and commercial furnishings-tablecloths,tea towels, sheets, wallpaper/wallpaper,curtains, etc.Industrial products – bags,canvas, etc. shrinkage fiber with scales on the surface. It is madeup of proteins.Fiber appearance varies by breed of sheep. Finer, softer and warmer fibers tend to have smoother scales. Thicker, coolerfibers have fewer and coarser scales. Generally,fine wool fibers with finer scales havea duller appearance than inferiorfiberswith fewer scales.Features AppearanceshrinkageElasticityMoistureabsorption,easytoabsorb moistureHigherignition temperature than cottonFlamespreadspeed,lower heat release and heatof combustionResistantElectricity,su444-Electric sweaters, hats, etc.Blankets, rugs,felts and upholsteryHorse cushions, saddle pads SilkSilk is a fine, continuous threadthatunwinds from the cocoon of thecaterpillarofthe moth called the silkworm. It is madeup of proteins. It is very shiny due to the triangular prism-like structure of the silk fibers, which allows itsfabric to refract incoming light at different angles. Propertiesof isshiny, smooth and soft,non-slipislight and strong, but loses up to 20% of its strength when wethasmedium to lowelasticity. If stretched, it stays stretchedweakens if exposed to too much sunis affected by insects, especially if soiledrecovers up to 11% of its humidityapplications shirts,ties,Shirts,FormalWear-FashionUnderwear,Sleepwear,Dresses,DressSuitsandSundressesManyFurniture ApplicationsUpholstery,WallCoverings and WallHangingsOther Natural FibersJute Lejutecomes from thelarge plant of the same name and is easilyprocessed and harvested.It is the cheapest fiber and it is used in large quantities.FeaturesNotdurable, deteriorates quickly when wetLow strength Insufficientstrength,cannot be bleached pure whiteApplicationsBinding yarn for carpets, coarse fabrics and cheap fabrics, etc. 44Thinpaper. Kapok is a white,hairy fiber obtained from the pods of aplant and tree called Ceiba Pentandra whichgrows in Java and Sumatra (Indonesia), Mexico, Central America and the Caribbean, inthenorthof South America and tropical West Africa.is called silk cotton because its shine is comparable to that of real silk. PropertiesSmooth textureHighglossLow Short fiber lengthMoistureresistant, dries quickly when wetApplicationsMattresses, cushions, upholsteryAsemaxhe also known asAsemaxheer and China .It comes from a long flowering plant.Properties HardFragileGlossyApplicationsCanvas, upholstery, clothing, etc.2. Man-made fibers2.1. Artificial(regenerated)CelluloseThey are derived from the cellulose in the cell walls of short cotton fibers called linters,or more commonly pine wood. There are three types of rayonfibers:rayon, acetate and triacetate.Rayon Rayon [Link to Raylon] Made from natural polymers that mimic natural cellulosefibers. It is neither a real synthetic fiber nor a real natural fiber.rayoncomesin two varieties:tacky and high wet modulus (HWM).These are in turn produced in different types to provide certain specific properties.PropertiesSoft, smooth, comfortable Naturally high shineVery absorbentPoordurability and shape retention, especially when wetLow elastic recovery Generallyweaker, but HWM rayon is stronger, retainsappearance and looksgood.ApplicationsClothing – Shirts, dresses, jackets, underwear,liners, suits, ties, etc.Furniture – bedspreads, sheets, blankets, curtains,upholstery, etc.Industrial uses e. Acetate is a thermoplastic that can be formed into any shape by applying pressure and heat. Acetate has good shape retention.PerformanceThermoplasticGood abrasionresistanceSoft, smooth,elasticBouncy and quickdryingShiny appearanceLowresistance,quickly loses resistancewithwater,requiresdrycleaningPoor abrasion resistance underwear,liners, suits, ties, etc.For fabrics such as satin,brocade,taffeta, etc.It is a thermoplastic fiberthat is more elastic than other cellulosic fibersProperties ThermoplasticElasticShape retention and wrinkle resistanceShrinkableEasytowashandholdswell even at higher temperatures44Ply44Ply4Goodhold444Choose4garments where kinkresistance is important e.g. skirts and dressesCan be used with polyester to make shiny garments2.2. Non-cellulosic syntheticfibersPolymersThis group of fibers is characterized by thesynthesis or manufactureoflargermoleculescalledlinearpolymers from various elements.The molecules of each specific compound are arranged in parallel lines in the fibers. This arrangement of molecules is called molecular orientation.The properties of thesefibersdepend on their chemical composition and thetype of molecular orientation. NylonIn nylon, the fibrogenic substance is a longchain synthetic polyamide in which less than 85% of the amide bonds are directly linked to two aromatic rings. The elements carbon, oxygen, nitrogen and hydrogen are chemically combined into compounds which react to form longchain molecules, chemically known as polyamides,which then formfibers.Nyloncomesinmanyforms. Each depends on chemical synthesis. They are: Nylon 4; 6; 6.6; 6.10; 6.12,8,10 and 11.FeaturesHighresilienceHigh elongation and elasticityVery strong and durableExcellent abrasion resistanceThermoplasticHighgloss,semi-gloss,semi-glossCapable44in4or4gloss,44 to 44brilliant.Clothing–tights, stockings, leggings, etc.Home furnishingsIndustrial applications – parachutes, tire cords, ropes, airbags, hoses, etc.PolyesterIn polyester, the fibrogenic substance is any long-chain synthetic polymer consisting of at least 85% by weight of esters of substituted aromatic carboxylic acids, but not limitedto, substituted terephthalate units and substitutedpara-paraben units. productionofthisfiber, the basic elements of carbon, oxygen and hydrogen are polymerized.Themethod of production, the combination of ingredients and the final molecular structure of the fibrogenicsubstancecanallvary.PropertiesThermoplasticGood resistanceHydrophobic (non-absorbent)Applications – Clothing–Woven and knitted, shirts, trousers, jackets, hats, etc. WaistBelts,SeatBelts,WaistBeltReinforcerSpandexThe fibrogenic substance used inthemanufactureof spandex is any longchain synthetic polymer containing at least 85% segmented polyurethane. Variations mayoccurinthemanufactureof this fiber.The buildingblocks of nitrogen, hydrogen, carbon, and oxygen are synthesized with other substances assoftsegmentsorportionsof ethyl esters in polymer chains that provide stretch segments and hold the chainsoftheharder chain segment together.Thebrandnames of the three spandex fibers are Cleer-span, Glospan and Lycra.PropertiesHigh elasticityComfortGreat shape retentionDurabilityApplicationsNever used alone but always mixed with other fibersGarments and clothing items stretch for acomfortable fitHosieahlHosieahlClothing4UnderwearSocks, leggings andSculpting bra cupsAcrylicIn acrylic, the fibrogenic substance is any long-chain polymer containing at least 85% by weight of acrylonitrile units. Using complex processes, carbon, hydrogen and nitrogen, buildingblocks are synthesizedintolargerpolymerassemblies with small amounts of other chemicals.Themethod of production, the combination of ingredients and the final molecular structure of the fibrogenicsubstancecanallvary. PropertiesSoft, warm Wool-like handling propertiesElasticityShape retentionApplicationsClothingHome furnishings3. Artificial– Protein fibersProteinis converted into milkandchemicallyprocessed.fiber. However, thisfiberwas not commercially successful. 4.ArtificialrubberfibersFibrogenicsubstancesconsisting of natural and synthetic rubber. Cured rubber is produced in strands, so that the crosssection is either round or square,withrelativelysmooth longitudinal surfaces.
Read More
IntroductionTextiles have such a significant impact on our daily lives that everyone should know some basics about fibers and their properties.textile fiber is used in a variety of applications such as blanket, warmth, personal decoration, and even the display of personal wealth.Textile technology has come a long way to meet these demands. A basic knowledge of textile fibers will facilitate intelligent evaluation of fiber brand and type and help determine the right quality for the application.This bulletin covers various textile fibers and their properties that are important for suitable textile applications.Classification of fibersTextile fibers can be broadly divided into two groups:Natural fibers Synthetic fibers Natural fibersNatural fibers are subdivided according to their origin as shown below.See table below when available.Fiber Name Source IngredientVegetableCotton Cotton Ball CelluloseKapok Kapok CelluloseFlax Cellulose from Flax StalkCellulose from Jute StalkHemp Hemp or Manila Cellulose 4 Shinagave 4 Cellulose Co4 and Abaca Cellulose 4 Shinagave 4 Cellulose R4 Cellulose 4 R4 CellulosePineapple Leaf CelluloseAnimalWool Sheep ProteinSilk ProteinHairy Animal ProteinMineralsAsbestos Miscellaneous Rock Silicates Magnesium and CalciumSynthetic Fibers as shown in the picture 4 Synthetic Fibers 4 as shown in picture 4 man -made 4 ingredients and origin.Name of fiber sourceCelluloseCotton rayon or wood linterCotton acetate or wood linterTriacetate cotton or wood linterNon-cellulosic polymersNylonAcetate 4 Aliphatic polyamide 4 Polyamide ytrate 4 4 4 Polyamide ester4 4 1 4 1 4 Denatured Acrylonitrile AcrylonitrilePolyurethane PolyurethaneOlefin Ethylene or PropyleneVinyon Vinyl ChlorideSaran Vinylidene ChlorideNovoloid Phenyl NaphtholPolycarbonate Carbonate (Polyester derivatives)Profluoroethylene4,4 Fluorocarbonate4,4 etcRubberRubber Natural or synthetic rubberMetalMetal Aluminum, silver, gold, stainless steelMineralGlass Silica Sand, limestone, other mineralsCeramic Aluminum, silicaGraphite Carbon 1. Natural FiberCottonCotton is the most commonly used natural fiber in clothing and grows in a ball around the seed of the cotton plant. Simple fibers are elongated cells that are flat, twisted, hollow, and ribbon-like structures.PerformanceMedium to good resistanceVery little elasticity Poor resilience, easy to creaseComfortable and soft to the touchGood water absorptionGood thermal conductivityDamaged by insects, mold 4 Rot 4 Mite 4 Sun 4 Rot 4 Mopping 4 Increased use of textile productsCommonly used in woven and knitted garmentsHome textiles – bath towels, bathrobes, bedspreads, etc.Blended with other fibers such as rayon, polyester, spandex, etc. One expensive natural fiber, made from the flax plant.Production is labor intensive, so production runs are small. However, linen is valued for its exceptional coolness and freshness in hot weather.is composed of 70% cellulose and 30% pectin, ash, woody tissue and moisture.performancestrongest plant fiberlow elasticity, easy to wrinklerelatively smooth, softer after washingstrong water absorptiongood thermal conductivity, cool to the touchshinybrittle, 4 brittle, 4 brittle, 4 dam broken.Resistance to moths and carpet beetles via mildew, sweat and bleach
Read More
1. Internship Gate: This design thinking approach focuses on the economics and financials of delivering an idea or solution as a product or service. It’s like a roadmap that guides designers and makers through the risky process from idea to production. “Gates” or checkpoints are strategically placed to assess the process from time to time so that growth and profits are not impeded. These checkpoints are managed by specific governing bodies, or “gatekeepers”, who decide whether projects go ahead or are cancelled.2. VYKAMP: This methodology is one of the most important in design thinking, especially because it puts a lot of emphasis on the interaction with the environment and people in the design thinking process.3. SIMON HERBERT: The method divides the process into 7 distinct phases, namely: Definition, Research, Idea, Prototype, Selection/Target, Implementation and Learning. Although considered a non-iterative process, the steps of the Simon Herbert method can occur simultaneously.More Design Thinking approaches to consider:1. BOOT CAMP BOOTLEG (Stanford): The Stanford Institute approach is one of the most explicit and comprehensive available. He defines his stages as empathy, definition, idea, prototype and test. Empathy is key to the human-centered approach to design thinking that this approach takes. This approach is also a non-linear design thinking approach.One can move forward or backward through the stages and contribute along the way.2. DONUT: The method of looping and iterating is Donut. Also known as an iterative design process loop, it starts with a design brief and runs in circles until a solution is found. The first step is thorough research, including literature review, personal observation, etc.The second stage involves problem solving, involving careful analysis of information and patterns. In the third phase, we identify and prioritize user needs. Finally, in the final stage, the tool or the product satisfies the needs of the consumer and brings solutions to the identified problems.3. STUART PUGH: It’s a combination of cyclic and linear design process methods.It is useful for engineering problems. It is a kernel-based model that involves stages of iteration, testing, and evaluation. In addition to the core, peripheral business and design activities exist.4. Loop Chaos: Another approach to design thinking is looping and iterating.It includes the interactions of the business within the circle and the environment and people outside the circle.5. Spiral: A method similar to the donut or circular chaos method is the spiral method. It supports an incremental process in which product improvement and refinement occurs gradually until prototyping and final product launch is achieved. The list of Design Thinking strategies continues:1.Designing for growth: This approach is complete in itself. It’s one of the few ways to include a tool for every step of the design process. It also shows how the design process narrows as it progresses. In particular, it asks four questions: What is it? what ifwhat wow? what works These four questions make up the process of Design Thinking.2. NPD: There are three different versions of this method.That of Booz et al. All the basic phases of the different models from the design literature have been combined. It is based on extensive research conducted through interviews, case studies, etc. Ulrich and Eppinger’s NPD method focuses on cost and estimation during product development and detailed design.Andreasen and Hein’s NPD approach integrates three distinct aspects into the design process: market, product, and production. The phases of the model are requirements identification, requirements investigation, product justification, product design, product preparation, and implementation.3. V: The V model includes links between validated and validated phases. It defines a unified procedure for the design and development of a product or service.But instead of descending in a linear fashion, it rises in the encoding stage, forming a characteristic V-shape.4. CASCADE: The simplest approach to design thinking, this model applies to simple, well-defined problems.These methods are advantageous for helping different companies in the innovation process. A good design approach is to determine which approach is appropriate for the current need and problem, and iterate on the solutionFashion design starts with fashion designs. Fashion drawings are blueprints of drawings that vary in style and amount of detail.● The plane sketch is generally used to trace the shape and silhouette of clothing.● Fashion designs can also be 3D fashion figures with textures, shadows and moving lines of fabric drape.● Fashion illustration is a more detailed type of fashion drawing that can include color and accessories – fashion figures can have detailed faces or hairstyles to show a head-to-toe look.Meet one of your new mentorsBEGINWhy is fashion design important?Fashion designs help communicate the technical elements of a design, such as length and fit, to pattern makers. Fashion graphics can also serve as a mood board, illustrating the emotional language of a design.● Fashion designers can use drawing to communicate their style through different types of poses or drawing tools.● For example, fashion designer Karl Lagerfeld’s fashion sketches are notable for their use of pencil and chalk.● Dolce & Gabbana studio added decorative details to fashion prints, such as custom sequins on clothing.What is shorthand?The first step in drawing fashion figures is to make fashion sketches. A sketch is a quick sketch detailing the proportions of a fashion figure. Sketch is almost like a paper doll – it’s a model that can be placed under a piece of paper to draw clothes.If it’s your first time drawing people, try sketching on the pre-made stylish sketch templates. Learn more about the sketch here.What does fashion painting need?If you want to DIY your own sketch models or fashion figures, you will need the following items:● 8.5 x 11 inch sheet of paper● Hard pencil● Ruler● EraserLeather How to Draw a Fashion Figure 10 StepsModels’ body proportions are disproportionate to the human body.In general, fashion figures follow the industry standard of “nine heads” length: this means that the height of the fashion figure is approximately nine times the size of the design’s head. These elongated fashion figures help show off clothes, especially dresses and skirts.Here is a step-by-step guide to making a fashion design:1. Draw a vertical line down the center of the paper. This line from head to toe will be the center of balance of a stylish silhouette.2. Divide the paper into nine equal sections. These nine parts will include the fashion character’s head, bust, waist, hips, thighs, calves, ankles, and feet. You can draw horizontal lines, about an inch and an eighth each, to separate the nine sections.3.Draw the pelvic region. In the center of the balance line, draw a square for the fashion figure’s pelvis. It can be rotated in different directions to create different positions.4. Draw the torso and shoulders.Draw two lines from the top of the pelvic square to create the torso. The lines again bend inward and outward to create the center. The shoulders should be pelvic width, but the line of the shoulders can slope to create a rounded forward stance.5. Draw the neck and the head. The neck should measure one-third the width of the shoulders and half the length of the head. Draw a circle proportional to the body for the head.6. Draw the legs. The character’s legs should be approximately four times the length of the head.The legs are divided into two parts: the thigh and the calf. The upper thighs should be the same length as the head. Tap the yarn down to the knee and down to the ankle so that the ankle is about a quarter of the size of the head.7. Pull the arms.Create the arm with tapered lines up to the elbow and then down to the wrist. The arms can be placed along the character’s body or on the hips. Finish with hands and fingers.8. Draw the feet.The feet should be about the same length as the head.9. Create your fashion design. Now that the fashion character sketch has been drawn, you can start creating designs based on the character. 10.Explain your design. Color the design to show the movement of the fabric or to emphasize where the material gathers on the garment. Color fashion designs to add dimension. Add embellishments to the fabric to show off your own style. Add facial details or hairstyles to complete the look.Fashion Sketch: A Step-by-Step Guide to Drawing the Basic Fashion Sketch with 9 Head Proportions for BeginnersDrawing fashion figures doesn’t have to be difficult. In this tutorial, you’ll learn an easy way to create professional sketches, one step at a time!I’ve divided this tutorial into several parts:Part 1: Design GuidePart 2: Drawing the Sketch SkeletonPart 3: Adding ShapesWhat is a Fashion Sketch?Sketches are the model drawings you draw for designer clothes.You can also call it a fashion figure or a model.fashion sketches can take different shapes, sizes and styles. It all depends on the end use you’re designing for and the people you’re designing for. Throughout my career, I have used different sketches. Some are more stylized, while others are very simple.(P.S. If you want to take the stress out of creating your own sketch models and start designing right away, check out this 9 Head Female Figure Sketch Kit I made.) The picture shown above illustrates the realistic body (left) and 9 scale fashion sketches of the head (right)What is the proportion of fashion sketches?I show how to draw a sketch “9 heads”.The sketches are 9 heads long from the top of the head to the ankle, much longer than the average female. (Feet are excluded from the equation, as their height varies with shoe type and heel height.) A 9-headed model exaggerates the proportions of mannequins, showing clothing in dramatic, elongated proportions.However, mannequins can and should have different body proportions, so I encourage you to design your sketches in any shape and size.This tutorial will teach you how to make a 9 head sketch (using the proportions taught by the Fashion Institute), but you can adjust the proportions later to better suit your target audience.What does “nine heads” high mean?The height and width of the head are used as an indicator of the size of the rest of the body.In this image you can see how the body is divided into 9 equal parts from the top of the head to the ankles. Feet were excluded because their height can vary depending on the type of shoe and the height of the heel. It is useful to use the header as the measurement point instead of the actual measurement, as your paper size may vary.From a small piece of paper to a poster board, first draw 9 portraits and you can describe the proportions and size of your body.If you are using 8.5 x 11 paper, each letterhead can be about 1 inch long, but this measurement will vary depending on your paper size.Let’s start the tutorial!Before you begin, you will need paper, a pencil and a ruler (or any ruler).) tracing paper is helpful but not required. Draw lightly with a pencil so you can erase easily. Part 1: Creation GuideStep 1: Draw 9 heads of approximately the same shape and size and label them from 1 to 9 (Leave some space at the bottom of the page for the feet.) Step 2: In the Draw horizontal lines between each head (make sure they are straight) Step 3: Add a dotted line approximately 1 1/2″ and 4 1/4″ from the heads Step 4: Mark as such Anatomy pagelabeled.Part 2 – Draw the Skeleton of SketchStep 1: Draw a vertical line, perpendicular to the horizontal guide. This will be the midlineStep 2: Draw an oval for the headStep 3: Draw a horizontal line for the shoulders (about 2 inches across head)Step 4: Repeat step 3 for the hips (the hips and the shoulders are Step 9: Draw a cylinder for the neckStep 10: Connect the neck to the shouldersStep 11: Draw small ovals for the kneesStep 12: Draw small ovals for the knees Ankle Part 3 — Adding the formOnce the skeleton of the sketch is established, we can add the muscular structure and the form.Take your time and paint lightly so you can erase easily.Step 1: Draw ovals for shoulders, biceps and forearmsStep 2: Draw ovals for thighs and calvesStep 3: Draw triangles for feetStep 4: Add shape and outline of the neck Trace the outline of the arm using the ovals as a guide. Repeat step5 on the other side: Trace around the leg and foot as shown, using the ellipse as a guide. Repeat step 6 of on the other side: add neck, bust and underwear lines as shown.Step 7: Add centerlines on each side of the body as shown.This is called the “Princess Line”.*These stitching lines are a useful guide for drawing the garments* Step 8: Modify the sketch as needed, adjusting the scale if necessary. Then follow the steps below to complete the sketch.Both sides of the sketch must be mirror images of each other to be accurate when drawing clothes.
Read More
Sarees in different ways. The pleats are tied in the back and the Pallu is worn over the shoulders.The traditional Kodagu saree is made of silk and cotton. The patterns of these sarees are vibrant and represent the culture of Karnataka. The body of the saree is decorated with prints, stripes or floral works. Ilkal Sarees:Ilkal sarees are one of the most popular cultural clothing styles for Karnataka women. The name Ilkal comes from the town of Ilkal located in the Bagalkot district of Karnataka. These sarees are made from silk and cotton. These sarees are also a great traditional outfit for Karnataka girls.Traditional Karnataka Ilkal sarees are woven with cotton warp threads on the body and rayon warp threads are used for the border and pallu part of the saree.The main body of Ilkal sarees consists of simple designs and the beautiful pallu consists of flattering designs like temple towers, palanquins, elephants and lotuses. The main attraction ofIlkal sarees is the border which is around 4 to 6 inches wide. The saree includes a striking trim at the hem and bottom that makes the saree look stunning. Commonly used colors for sarees are garnet red, malachite green and parrot green.OverviewNative tribes bring India closer to a hazy and indifferent picture.Far removed from contemporary trends and economic development, they have their own personal identity as Aboriginal people, with their own language, religion, festivals, food, dance and music. With such a mystical culture and hospitality, they also maintain the contrast of patriarchal and matriarchal societies.I can’t be sure of the total number of tribes in India, but after extensive research I can say that there are more than 500, or about 9% of the total population of the country. The vibrant scene of Indian tribal society stretches from remote villages hidden in India’s Himalayan region to the southernmost point of India – from the remotest corners of northeast India to the sand dunes of the Rajasthan. India’s tribal population makes up about 15% of the country’s population, with the majority found in central India.Now here is the real picture: the great tribe of India in its mysterious past contains all the obscure origins of life. Their way of life is completely different from the rest of the world. With an obscure history, they still compete to keep up with modern trends. Their survival largely depends on agriculture and craftsmanship, but the Indian tribes still present the broad face of your little-known “other India”. However, simply studying or getting close to a particular tribe does not paint the complete picture, as each tribe has its own unique culture – food, festivals, dances, music, religion and language.To know more about Indian tribes, here is a complete list of 20 selected tribes in different corners of India. 1. Gonde TribeThe Gonde tribe, known for their bravery, is mainly spread in the Chindewala region of Madhya Pradesh in central India. They are also found in Bastar district of Chhattisgarh, parts of Maharashtra, Andhra Pradesh and Odisha. So while you tour Madhya Pradesh, mumble and tinker with the alluring sculptures of Khajuraho and Sanchi Stupa respectively, before driving from the majestic palaces at Kanha) and Bandhavgarh Whispering Forest (Bandhavgarh), drive to the Gondi (Gondi) forest to experience the unique way of life of local Gonzi people.The Gund tribe are fluent in Telugu, Hindi, Marathi, Parsi and many other Drava languages. ChapterExperiment What? The rustic colors with mud walls and thatched roof huts, clay pots, traditional costumes – men in saris and women in saris and ornaments, the festivals and ceremonies of Keslapur Jathra and Madai are all worth seeing. be lived. Try Kodo or Kutki, the staple food of the Gond people; moreover, they are mainly meat eaters. 2.Bhil TribeIf you travel Rajasthan on royal wheels, from huge forts and palaces to Jain temples, experiencing the lifestyle of the Bhil tribe is an absolute contrast. This tribal community in India is mainly found in the Aravalli range of Sirohi in Udaipur and some places in Dungarpur and Banswara districts in Rajasthan. Furthermore, Bir tribe settlements have also been discovered in parts of Gujarat, Madhya Pradesh, Maharashtra and Tripura. experience what? Cultural Harmony – Ghoomar Dance, Than Gair (a type of religious dance and drama) and Baneshwar Fair held in January or February are the main attractions.Beli, a language of the Indo-Aryan family, is one of the most interesting experiences. 3. Santhal TribeThe Santhal tribe is the largest tribe in West Bengal, mainly distributed in Bankura and Purulia regions. They are also common in parts of Bihar, Jharkhand, Odisha and Assam. The journey to the abode of the Santars begins in Kolkata, the cultural capital of India, passing through the terracotta temples of Bishnupur and Bolpur.The Santhals rely heavily on agriculture and animal husbandry. In addition, they are well versed in the art of hunting. experience what? When driving in Bankura and Purulia, Santhali Dance and Music is one of the major attractions that you should not miss. Moreover, festivals like Karam, Maghe, Baba Bonga, Sahrai, Ero, Asaria, Disum Sendra and Namah often fascinate tourists. 4.Greater Andaman TribeThe world lost two languages when Boa (one of the speakers of the two Greater Andaman Khora and Bo languages) died in 2010. So before eradicating these unique tribes who speak the Djru and Sare languages , it is planned to sail to Andaman and explore the place where the indigenous people live. The Greater Andamanese tribes, including the Onge, Jarawa, Jangil, and Sentinelese, are believed to be the islands’ original inhabitants. But today, a lot of species are on the verge of extinction. Nevertheless, the remaining population of the Greater Andamanese depends largely on vigorous survival campaigns and Indian organizations.experience what? Well, it’s hard to tell them apart by their looks – skin color and clothes – but you’re yet another traveler who will end up capturing their way of life. The Great Andamanese are found primarily in the Channel Islands and parts of Rutland Island. 5. Khasi TribesIf you are looking for the culture hidden in the mysterious mountains of Meghalaya, the national cry of the Khasi tribe, filled with a lot of music, playing instruments such as drums, guitars, flutes, woodwinds and metal cymbals, will definitely make your trip to Mei Jalaya bright and impressive.The Khasi tribe is mainly distributed in the Khasi hills of Meghalaya, but also in parts of Assam, Arunachal Pradesh, Manipur and West Bengal. experience what? Language aside, it’s South Asian language and dress – Jainsem for women and Jymphon for men – a five-day extravaganza, the Nongkrem Festival is a feast for the eyes of the traveler. 6. Garo Tribe TheGaro Tribe is one of the few matrilineal societies in the world, mainly found in the hills of Meghalaya State and known for its vibrant lifestyle.They are also found in neighboring parts of Bangladesh and parts of West Bengal, Assam and Nagaland. It is easy to distinguish the Garo tribe from other tribes in Meghalaya. Women are often seen in various traditional ornaments, while men wear turbans with feathers behind. What experience? The unique forms of Garo architecture such as Nokmong, Nokpante, Jamsireng and Jamadaal are an abstract capture in your images.Also, the Wangala Festival in Asanang is an event not to be missed. 7. Angami TribeIt is the famous hornbill festival of the Angami Naga tribe, which attracts tourists to Nagaland, the farthest corner of northeast India. The Angami Nagas are one of the largest tribes in Nagaland and are widespread in the Kohima region. Besides the Hornbill Festival, the main attraction is their intricate and beautiful woodwork and artwork. The Angami Nagas are famous for making bamboo products, rattan furniture, beds, shawls and powerful machetes. What experience? The linguistic form, the Angami language, identified by different names such as Gnamei, Ngami, Tsoghami and Monr, is another important feature to note. Moreover, their clothing styles – white Mhoushu and black Lohe for men, Mechala for women, and decorations like beads, miniature mask pendants, bracelets and bracelets – are sure to catch your eye. Well, diehard carnivorous travelers can try Angami’s unique pork dishes. 8. Munda TribeIf you are at the Munda tribe residence, do not miss the Nupur dance. Their settlements are mostly located in the highlands region of Chota Nagpur, mostly in the jungles of Jharkhand. Additionally, parts of West Bengal, Chhattisgarh, Bihar and Odisha are also inhabited by the Munda tribe. In the vast ecological circle, these Munda tribes follow the simple and basic way of life of the Sarna religion, and believe in a god named Simpanga.experience what? Mage, Phagu, Karam and Sarhul are the main festivals of the Munda tribe and attract tourists. forget the unique preparation of momo, steamed meatballs and thukpa, delicious! Head to the land of the Bhutias during the Losar and Losing festivals to experience a vibrant culture – dance, music and religion.Diehard meat eaters can try the spicy beef. 10. Chenchu TribeChenchu Tribe are one of the indigenous people of Andhra Pradesh and have been living in the middle of Nallamala forest for many years. They are mainly found in the regions of Mahboobnagar, Nalgonda, Prakasam, Guntur and Kurnool. Their life is difficult as they mainly depend on hunting and trading bush products such as roots, tubers, fruits, bidi leaves, twists, honey, gum, tamarind and green leaves .experience what? Well, in addition to speaking with a Telegu accent, they are also proficient in various forms of craftsmanship. Additionally, the Chen Chu tribe is extremely picky when it comes to etiquette. Their ritual representations to various gods are major attractions for tourists.11. Kodava TribeAs you drive from Mysore along the Mysore-Madikeri road, you slowly walk towards the home of one of India’s unique ethnic groups, the Kodava tribe, known for their bravery since ancient times. As one of India’s booming ecotourism destinations, Coorg attracts many weekend getaways from nearby towns in Karnataka and tourists from across the country and around the world, but the harmony and ethnicity of the tribe Kodawa Explorers are one of the main attractions. In the cultural diorama, the Kedawa tribe loves music and dancing. This color can be seen during the festivals of Puttari, Kaveri Sankramana and Kailpodhu. Plus, these guys are passionate about the unisex sport of hockey.If you are looking for such an interesting panorama, go there during the Kodawa Hockey Festival, which takes place every year. 12. Toto Tribe – Toto tribe is one of the isolated tribes living in Totopala village in Jalpaiguri district of West Bengal. Their way of life is simple, relying mainly on the vegetable and fruit trade. Although they define themselves as Hindus, the Totos are devotees of the god Ishpa and the goddess Chima.If you are driving to Totopala during the peak winter season, head to Jadapala National Park, one of India’s most popular national parks, located about 20 kilometers from Totopala. Don’t forget to try Eu, a rustic drink made from fermented marua, rice flour and malt, served hot in a poipa (wooden cup). 13. Irula TribesExpert snake and mouse catchers, that’s what makes the Irula tribe of South India special. The Irulas have a population of around 300,000 and live in parts of Tamil Nadu, Karnataka, Andhra Pradesh and Kerala.Additionally, the Irulas are the second largest tribe in Kerala, mostly in the Palakkad region. So when you are on holiday in Kerala to enjoy the vast colors of the Nilgiri Ranges and sail along the sparkling backwaters of Alleppey, just head to Palakkad for a day. experience what? Irulas is heavily dependent on agricultural products such as paddy, raggi, dhal, plantain, chilli and turmeric. Moreover, the biggest attraction remains their colorful ritual performances.Although most of them are Hindus, they still believe in worshiping their own gods, and Elurath is also known to be familiar with white and black magic. 14. Nyishi TribeNyishi tribe is the largest inhabitant of the mountainous region of Arunachal Pradesh, mainly spread in parts of Papum Pare, Lower Subansir, Kurung Kumey, East Subansir and Upper Subansir. Although most of them have converted to Christianity, their religion still involves the belief in spirits associated with nature. experience what?The Nyokum Festival, dedicated to Goddess Nyokum, takes place every February and is an important attraction where you as a traveler can find interesting cultural and ethnic heritage of the Nyishi tribe.15. The Bodo TribeThe Bodo Tribe are considered the earliest settlers of Assam and are today found in Udalguri and Kokrajhar in Assam and parts of West Bengal and Nagaland. If you want to recapture the traditional colors of the Bo people, head northeast during the Baishagu festival, celebrated every spring, to worship Lord Shiva (locally known as Batu). Also, the Bodo tribe are carnivorous – cannibals, so not eating my compatriots – fight the travelers, just wake up your carnivore and try unique pork and fish.What experience? Weaving is one of the deepest parts of Hakata culture, so you can buy handcrafted products. 16 TYPES OF METHODOLOGIES IN DESIGN THINKING AND INNOVATIONThe process of design thinking seeks to solve real-world Solve problems in an auth and practical way, with a strong focus on human needs and expectations. From the outset, Design Thinking methods and tools are user- or client-centric. This human-centric approach offsets many of the risks and ambiguities associated with innovation.Design thinking enables appropriate and achievable creativity and innovation by engaging with grassroots users and making them an integral part of the process. Design thinking follows several different types of methodologies or approaches. However, they place all human needs at the heart of their approach.
Read More